
Are you ready to elevate your snack game? Whether you’re hosting a party, craving a cozy night in, or just want a delicious plant-based treat, these 20 creamy vegan dips have you covered. From zesty classics to inventive new flavors, there’s something here for every taste and occasion. Let’s dive in and discover your next favorite dip!
Creamy Avocado Lime Dip
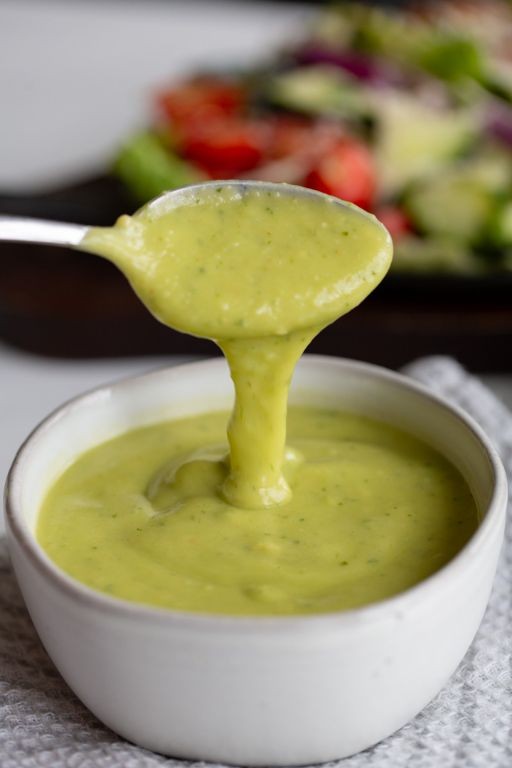
A few years ago, I was hosting a last-minute summer potluck and needed something quick, fresh, and guaranteed to please a crowd—that’s when this Creamy Avocado Lime Dip was born in my kitchen. It’s become my go-to for everything from game day snacks to casual backyard gatherings, and I love how its bright flavor always seems to disappear first from the table. Honestly, I make it so often now that I keep ripe avocados and limes stocked at all times, just in case a craving (or a hungry guest) strikes.
Serving: 6 | Pre Time: 15 minutes | Cooking Time: 0 minutes
Ingredients
– 3 ripe avocados
– 1/4 cup sour cream
– 3 tbsp fresh lime juice
– 1/4 cup finely chopped red onion
– 1/4 cup chopped fresh cilantro
– 1 jalapeño pepper, seeded and minced
– 1/2 tsp ground cumin
– 1/2 tsp kosher salt
Instructions
1. Cut the 3 ripe avocados in half, remove the pits, and scoop the flesh into a medium mixing bowl.
2. Add 1/4 cup sour cream and 3 tbsp fresh lime juice to the bowl with the avocado.
3. Mash the avocado, sour cream, and lime juice together with a fork until mostly smooth but with some small chunks remaining for texture.
4. Stir in 1/4 cup finely chopped red onion, 1/4 cup chopped fresh cilantro, and 1 minced jalapeño pepper until evenly distributed.
5. Sprinkle 1/2 tsp ground cumin and 1/2 tsp kosher salt over the mixture and fold gently to combine all ingredients thoroughly.
6. Taste the dip and adjust seasoning if needed, then transfer it to a serving bowl immediately. Tip: For the best flavor, use avocados that yield slightly to gentle pressure—if they’re too firm, the dip won’t be as creamy.
7. Cover the bowl tightly with plastic wrap, pressing it directly onto the surface of the dip to prevent browning. Tip: This contact method with plastic wrap is key for keeping the avocado vibrant green for several hours.
8. Refrigerate the dip for at least 30 minutes before serving to allow the flavors to meld. Tip: Chilling also helps the dip thicken slightly, making it perfect for dipping without being runny.
But what I adore most is its luxuriously creamy yet light texture, punctuated by the zesty lime and subtle heat from the jalapeño. It pairs wonderfully with crispy tortilla chips or fresh veggie sticks, and I’ve even used it as a vibrant spread for turkey sandwiches to brighten up lunchtime.
Roasted Garlic White Bean Dip
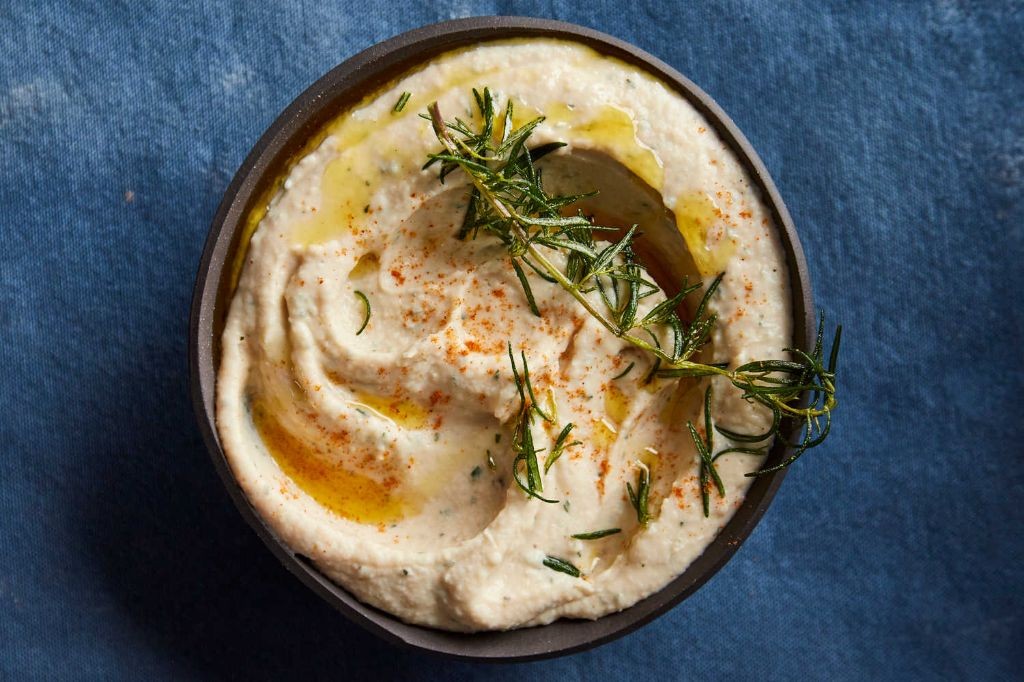
Gathering friends for a cozy winter evening always calls for something warm and comforting, and this Roasted Garlic White Bean Dip has become my go-to appetizer. I first made it last year when I needed a quick, crowd-pleasing snack, and now it’s a staple in my kitchen—perfect for those nights when I want something flavorful without spending hours cooking. It’s creamy, garlicky, and surprisingly simple to whip up, making it ideal for holiday gatherings or just a quiet night in.
Serving: 6 | Pre Time: 10 minutes | Cooking Time: 40 minutes
Ingredients
– 2 whole garlic bulbs
– 2 tablespoons olive oil
– 2 (15-ounce) cans cannellini beans, drained and rinsed
– 1/4 cup fresh lemon juice
– 1/4 cup tahini
– 1/2 teaspoon salt
– 1/4 teaspoon black pepper
– 2 tablespoons water
– 1 tablespoon chopped fresh parsley
Instructions
1. Preheat your oven to 400°F (200°C).
2. Slice the top off each garlic bulb to expose the cloves, place them on a piece of aluminum foil, and drizzle with 1 tablespoon of olive oil.
3. Wrap the garlic bulbs tightly in the foil and roast in the preheated oven for 30-35 minutes, until the cloves are soft and golden brown. Tip: Roasting garlic mellows its sharpness and adds a sweet, caramelized flavor that’s key to this dip.
4. Remove the garlic from the oven and let it cool for 10 minutes until safe to handle.
5. Squeeze the roasted garlic cloves out of their skins into a food processor or blender.
6. Add the drained cannellini beans, lemon juice, tahini, salt, black pepper, and water to the food processor.
7. Process the mixture on high speed for 1-2 minutes, scraping down the sides as needed, until smooth and creamy. Tip: If the dip seems too thick, add more water, 1 tablespoon at a time, until you reach your desired consistency—this helps avoid a pasty texture.
8. Transfer the dip to a serving bowl and drizzle with the remaining 1 tablespoon of olive oil.
9. Garnish with chopped fresh parsley. Tip: For extra flavor, let the dip sit at room temperature for 15 minutes before serving to allow the ingredients to meld together.
10. Serve immediately with your favorite dippers like pita chips or fresh vegetables.
Oozing with a velvety smoothness, this dip boasts a rich, nutty undertone from the tahini balanced by the bright zing of lemon. I love pairing it with crunchy carrot sticks or spreading it on toasted baguette slices for a satisfying bite—it’s versatile enough to elevate any snack spread without overpowering other flavors.
Smoky Eggplant Baba Ganoush

Nestled between holiday feasts and cozy winter nights, I found myself craving something smoky, creamy, and utterly satisfying—enter this baba ganoush. It’s my go-to when I want to impress guests with minimal effort, and the charred eggplant always reminds me of summer barbecues, even in December.
Serving: 6 | Pre Time: 10 minutes | Cooking Time: 40 minutes
Ingredients
– 2 large eggplants (about 2 lbs total)
– 3 tbsp olive oil, divided
– 3 tbsp tahini
– 2 tbsp lemon juice
– 2 cloves garlic, minced
– 1/2 tsp smoked paprika
– 1/4 tsp salt
– 2 tbsp chopped fresh parsley
Instructions
1. Preheat your oven to 400°F and line a baking sheet with aluminum foil.
2. Pierce each eggplant 8-10 times with a fork to allow steam to escape during roasting.
3. Rub 1 tbsp olive oil evenly over the eggplants’ skins and place them on the baking sheet.
4. Roast the eggplants for 40 minutes, turning them halfway through, until the skins are charred and the flesh is very soft when pierced with a knife.
5. Remove the eggplants from the oven and let them cool for 15 minutes until safe to handle.
6. Cut each eggplant in half lengthwise and scoop out all the flesh into a colander, discarding the skins.
7. Let the eggplant flesh drain in the colander for 10 minutes to remove excess moisture, which prevents a watery dip.
8. Transfer the drained eggplant to a food processor and add tahini, lemon juice, garlic, smoked paprika, and salt.
9. Pulse the mixture 8-10 times until mostly smooth but with some texture remaining, scraping down the sides as needed.
10. With the processor running on low, slowly drizzle in the remaining 2 tbsp olive oil until fully incorporated.
11. Transfer the baba ganoush to a serving bowl and stir in chopped parsley by hand for fresh color and flavor.
Just creamy enough to spread on warm pita yet robust with smoky depth, this baba ganoush shines as a dip or a sandwich spread. I love it with crunchy vegetables for contrast, and it only gets better after a day in the fridge as the flavors meld.
Chipotle Black Bean Dip
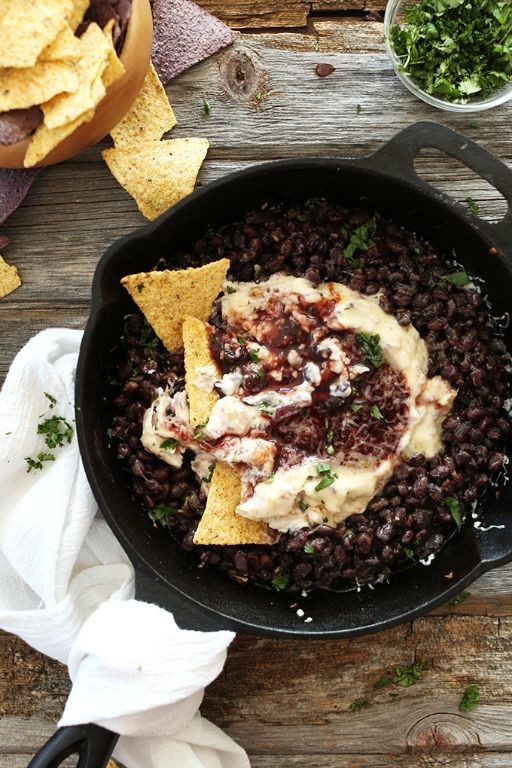
You won’t believe how this Chipotle Black Bean Dip became my go-to party lifesaver last holiday season when unexpected guests showed up. I had canned beans and a few pantry staples, and within minutes, I had a creamy, smoky dip that disappeared faster than the wrapping paper. It’s become my secret weapon for game days, potlucks, and those ‘I need a snack NOW’ moments—plus, it’s naturally vegan and gluten-free, which makes everyone happy.
Serving: 6 | Pre Time: 10 minutes | Cooking Time: 15 minutes
Ingredients
– 2 (15-ounce) cans black beans, rinsed and drained
– 1 cup sour cream
– 1/2 cup mayonnaise
– 2 chipotle peppers in adobo sauce, minced
– 1 tablespoon adobo sauce from the can
– 1/2 cup shredded Monterey Jack cheese
– 1/4 cup chopped fresh cilantro
– 1/4 cup diced red onion
– 2 cloves garlic, minced
– 1 teaspoon ground cumin
– 1/2 teaspoon smoked paprika
– 1/2 teaspoon salt
– 1/4 teaspoon black pepper
– 1 tablespoon lime juice
– Tortilla chips for serving
Instructions
1. Preheat your oven to 375°F (190°C) and lightly grease a 9-inch baking dish with cooking spray.
2. In a large mixing bowl, combine the rinsed black beans, sour cream, mayonnaise, minced chipotle peppers, adobo sauce, shredded Monterey Jack cheese, chopped cilantro, diced red onion, minced garlic, ground cumin, smoked paprika, salt, and black pepper.
3. Stir all ingredients together until fully incorporated, using a rubber spatula to scrape the sides of the bowl for even mixing.
4. Transfer the mixture to the prepared baking dish and spread it into an even layer with the spatula.
5. Bake in the preheated oven for 15 minutes, or until the edges are bubbly and the top is lightly golden.
6. Remove the baking dish from the oven using oven mitts and let it cool on a wire rack for 5 minutes.
7. Drizzle the lime juice evenly over the top of the dip just before serving.
8. Serve warm with tortilla chips for dipping.
Deliciously creamy with a subtle smoky kick from the chipotle, this dip has a rich texture that clings perfectly to chips without being too heavy. I love scooping it onto nachos or spreading it on tacos for an extra flavor boost—it’s versatile enough to steal the show at any gathering.
Cashew Queso Dip with Jalapeños

Nervously eyeing the clock before my last holiday party, I realized I needed a crowd-pleasing appetizer that could come together in minutes—enter this creamy, spicy cashew queso dip, which has since become my go-to for any gathering where I want to impress without the stress. It’s the kind of recipe that makes you look like a kitchen wizard, even if you’re secretly just blending a few simple ingredients while sipping wine. Trust me, once you try this vegan-friendly twist on classic queso, you’ll never go back to the processed stuff.
Serving: 6 | Pre Time: 10 minutes | Cooking Time: 5 minutes
Ingredients
– 1 cup raw cashews, soaked for 4 hours
– 1 cup water
– 2 tbsp nutritional yeast
– 1 tbsp lemon juice
– 1 tsp garlic powder
– 1 tsp onion powder
– 1/2 tsp salt
– 1/4 tsp ground cumin
– 2 jalapeños, seeded and diced
– 1 tbsp olive oil
Instructions
1. Drain the soaked cashews and add them to a high-speed blender.
2. Pour 1 cup of water into the blender with the cashews.
3. Add 2 tbsp nutritional yeast, 1 tbsp lemon juice, 1 tsp garlic powder, 1 tsp onion powder, 1/2 tsp salt, and 1/4 tsp ground cumin to the blender.
4. Blend the mixture on high speed for 2 minutes, or until completely smooth and creamy, scraping down the sides as needed for an even texture.
5. Heat 1 tbsp olive oil in a small skillet over medium heat until it shimmers, about 1 minute.
6. Add 2 seeded and diced jalapeños to the skillet and sauté for 3-4 minutes, stirring occasionally, until they soften and become fragrant.
7. Pour the blended cashew mixture into the skillet with the sautéed jalapeños.
8. Cook the dip over low heat for 2-3 minutes, stirring constantly, until it thickens slightly and is warmed through.
9. Remove the skillet from the heat and let the dip cool for 5 minutes before serving to allow the flavors to meld.
Zesty and irresistibly smooth, this dip boasts a rich, cheesy flavor from the nutritional yeast that pairs perfectly with the subtle heat of the jalapeños. I love serving it warm with tortilla chips or drizzling it over roasted veggies for an extra kick—it’s so versatile, you might find yourself sneaking spoonfuls straight from the skillet!
Spicy Mango Salsa Dip
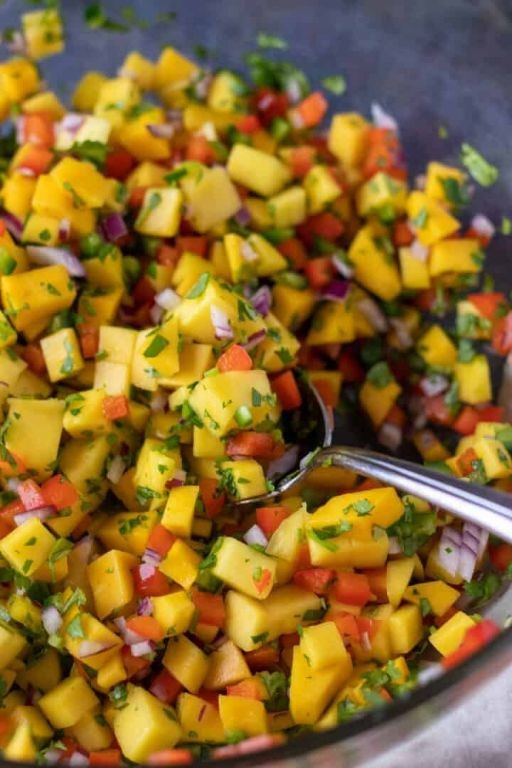
Whenever I crave something fresh and zesty to liven up a party or a quiet night in, this Spicy Mango Salsa Dip is my go-to. I first made it on a sweltering summer day when my garden tomatoes were overflowing, and now it’s a staple—my friends always ask for the recipe, and I love how it comes together in minutes with minimal cleanup.
Serving: 6 | Pre Time: 15 minutes | Cooking Time: 0 minutes
Ingredients
– 2 cups ripe mango, diced
– 1 cup cherry tomatoes, quartered
– 1/2 cup red onion, finely chopped
– 1 jalapeño pepper, seeded and minced
– 1/4 cup fresh cilantro, chopped
– 2 tablespoons lime juice
– 1 tablespoon olive oil
– 1/2 teaspoon salt
– 1/4 teaspoon black pepper
Instructions
1. Dice 2 cups of ripe mango into 1/4-inch pieces, ensuring it’s firm but sweet for the best texture.
2. Quarter 1 cup of cherry tomatoes and place them in a large mixing bowl.
3. Finely chop 1/2 cup of red onion and add it to the bowl.
4. Seed and mince 1 jalapeño pepper, adjusting the amount for less heat if preferred, and incorporate it.
5. Chop 1/4 cup of fresh cilantro and mix it in gently to avoid bruising the herbs.
6. Pour 2 tablespoons of lime juice and 1 tablespoon of olive oil over the ingredients.
7. Sprinkle 1/2 teaspoon of salt and 1/4 teaspoon of black pepper evenly.
8. Toss all components together until well combined, letting it sit for 10 minutes to allow the flavors to meld.
Just spoon this vibrant dip into a bowl and watch it disappear—the juicy mango pairs perfectly with the spicy kick from the jalapeño, creating a sweet-heat balance that’s irresistible with tortilla chips or as a topping for grilled fish. I often double the batch because it tastes even better the next day, once the onions have mellowed and the salsa has thickened slightly.
Creamy Tahini Lemon Dip
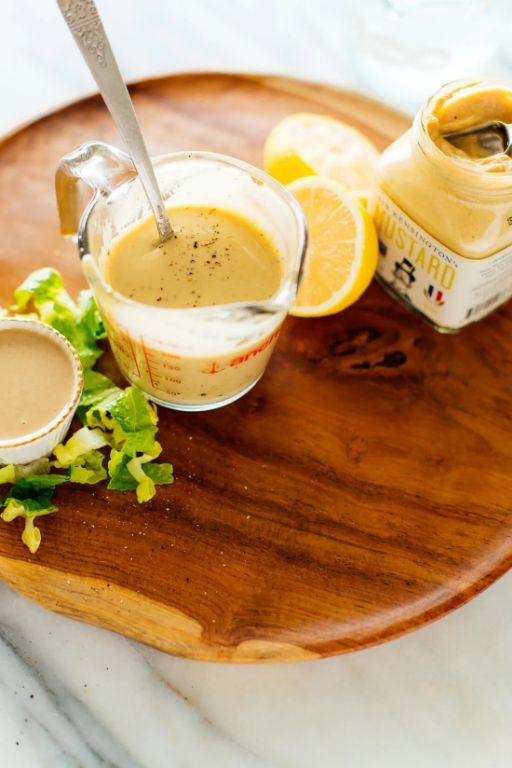
Sometimes, when I’m craving something tangy and creamy but don’t want to spend hours in the kitchen, I whip up this easy tahini lemon dip—it’s my go-to for last-minute gatherings or a quick snack while I’m catching up on my favorite cooking shows.
Serving: 6 | Pre Time: 10 minutes | Cooking Time: 0 minutes
Ingredients
– 1 cup tahini
– 1/2 cup fresh lemon juice
– 2 cloves garlic, minced
– 1/4 cup water
– 1/2 teaspoon salt
– 1/4 teaspoon ground cumin
– 2 tablespoons olive oil
– 1 tablespoon chopped fresh parsley
Instructions
1. In a medium mixing bowl, combine 1 cup tahini and 1/2 cup fresh lemon juice using a whisk. 2. Add 2 cloves minced garlic and 1/4 cup water to the bowl. 3. Whisk the mixture vigorously for about 2 minutes until it becomes smooth and creamy, scraping down the sides with a spatula as needed. 4. Stir in 1/2 teaspoon salt and 1/4 teaspoon ground cumin until fully incorporated. 5. Drizzle in 2 tablespoons olive oil while continuing to whisk for another 30 seconds to emulsify. 6. Fold in 1 tablespoon chopped fresh parsley gently with a spoon. 7. Transfer the dip to a serving bowl and let it sit at room temperature for 5 minutes to allow the flavors to meld. 8. Serve immediately or cover and refrigerate for up to 3 days.
Here’s the best part: this dip has a luxuriously smooth texture with a bright, zesty kick from the lemon, making it perfect for dipping veggies or spreading on warm pita. I love how the garlic and cumin add just enough depth without overpowering the creamy tahini base—it’s a crowd-pleaser every time!
Sun-Dried Tomato Hummus
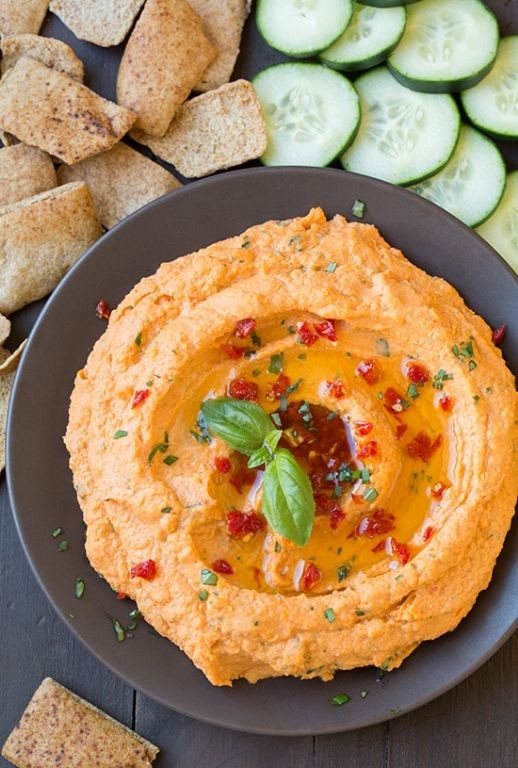
Now, I’ll confess: I used to think hummus was just… hummus. That was until a jar of sun-dried tomatoes fell into my pantry and changed everything. This version is my go-to for impromptu gatherings—it’s the one recipe I can whip up while chatting with friends in the kitchen.
Serving: 6 | Pre Time: 10 minutes | Cooking Time: 0 minutes
Ingredients
– 1 (15-ounce) can chickpeas, drained and rinsed
– 1/2 cup sun-dried tomatoes in oil, drained
– 1/4 cup tahini
– 3 tablespoons fresh lemon juice
– 2 cloves garlic, minced
– 3 tablespoons extra-virgin olive oil
– 1/2 teaspoon ground cumin
– 1/4 teaspoon salt
– 2 tablespoons water
Instructions
1. Combine the chickpeas, sun-dried tomatoes, tahini, lemon juice, minced garlic, olive oil, cumin, and salt in a food processor.
2. Process the mixture on high speed for 30 seconds until roughly chopped.
3. Scrape down the sides of the bowl with a spatula to ensure even blending.
4. Add the 2 tablespoons of water to the food processor. Tip: The water helps achieve a smoother consistency without making the hummus too thin.
5. Process the mixture on high speed for 1 minute until completely smooth and creamy.
6. Pause and check the texture by dipping a spoon into the hummus. Tip: If it seems too thick, add 1 more tablespoon of water and process for 15 seconds.
7. Taste the hummus and adjust seasoning if needed, but avoid over-salting as the sun-dried tomatoes add natural savoriness.
8. Transfer the hummus to a serving bowl. Tip: For a restaurant-style finish, use the back of a spoon to create swirls on the surface.
9. Drizzle with an additional 1 tablespoon of olive oil before serving, if desired.
Keep this hummus in mind for your next snack attack—its rich, tangy flavor from the sun-dried tomatoes pairs perfectly with crisp veggies or warm pita. I love how the creamy texture holds up even after a day in the fridge, making it a reliable staple for quick lunches.
Vegan Spinach Artichoke Dip
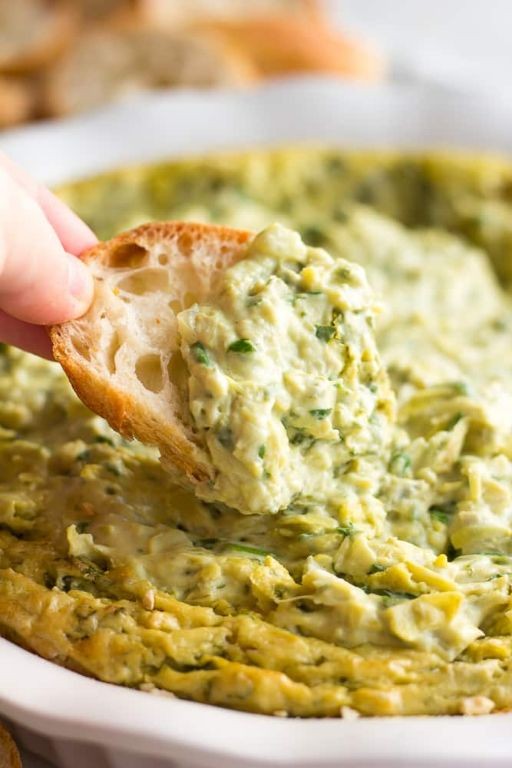
Zesty and creamy, this vegan spinach artichoke dip has become my go-to party appetizer ever since I discovered how to make it without dairy—it’s so good that even my cheese-loving friends ask for the recipe! I love whipping it up on cozy nights when friends drop by, and it always disappears within minutes.
Serving: 6 | Pre Time: 15 minutes | Cooking Time: 25 minutes
Ingredients
– 1 tablespoon olive oil
– 1 small yellow onion, finely chopped
– 3 cloves garlic, minced
– 10 ounces frozen spinach, thawed and squeezed dry
– 14 ounces canned artichoke hearts, drained and chopped
– 8 ounces vegan cream cheese
– 1/2 cup vegan mayonnaise
– 1/2 cup unsweetened almond milk
– 1/4 cup nutritional yeast
– 1 teaspoon lemon juice
– 1/2 teaspoon salt
– 1/4 teaspoon black pepper
– 1/4 teaspoon smoked paprika
Instructions
1. Preheat your oven to 375°F and lightly grease a small baking dish with olive oil.
2. Heat 1 tablespoon olive oil in a large skillet over medium heat until shimmering, about 2 minutes.
3. Add the finely chopped yellow onion and cook, stirring occasionally, until translucent and soft, about 5 minutes.
4. Stir in the minced garlic and cook for 1 minute until fragrant, being careful not to let it burn.
5. Add the thawed and squeezed-dry spinach and chopped artichoke hearts to the skillet, cooking for 3 minutes to warm through and blend flavors.
6. In a medium bowl, combine vegan cream cheese, vegan mayonnaise, almond milk, nutritional yeast, lemon juice, salt, black pepper, and smoked paprika, whisking until smooth and creamy.
7. Tip: If the mixture seems too thick, add an extra tablespoon of almond milk to reach a dip-like consistency.
8. Fold the spinach-artichoke mixture from the skillet into the creamy base until evenly incorporated.
9. Transfer the mixture to the prepared baking dish, spreading it into an even layer with a spatula.
10. Bake at 375°F for 20 minutes, until the edges are bubbly and the top is lightly golden brown.
11. Tip: For a crispier top, broil on high for 2-3 minutes at the end, watching closely to prevent burning.
12. Remove from the oven and let cool for 5 minutes before serving to allow the dip to set slightly.
13. Tip: Serve warm with tortilla chips, sliced baguette, or fresh vegetable sticks for dipping.
So creamy and rich, this dip boasts a velvety texture with savory notes from the artichokes and a hint of smokiness from the paprika. I love scooping it onto toasted pita wedges or using it as a spread for wraps—it’s versatile enough to elevate any snack spread!
Buffalo Cauliflower Dip

A s a self-proclaimed dip enthusiast who’s always looking for a crowd-pleaser that won’t weigh everyone down, I’ve found my new go-to for game days and casual get-togethers. This Buffalo Cauliflower Dip captures all the tangy, spicy kick of the classic wings but in a creamy, veggie-packed form that’s surprisingly easy to whip up—trust me, it’s become a staple in my kitchen because it’s just that good.
Serving: 6 | Pre Time: 15 minutes | Cooking Time: 25 minutes
Ingredients
– 1 head cauliflower, cut into florets
– 1 tablespoon olive oil
– 1/2 teaspoon garlic powder
– 1/4 teaspoon salt
– 8 ounces cream cheese, softened
– 1/2 cup sour cream
– 1/2 cup buffalo sauce
– 1 cup shredded cheddar cheese
– 2 green onions, thinly sliced
Instructions
1. Preheat your oven to 400°F and line a baking sheet with parchment paper.
2. In a large bowl, toss the cauliflower florets with olive oil, garlic powder, and salt until evenly coated.
3. Spread the cauliflower in a single layer on the prepared baking sheet and roast for 20 minutes, or until tender and lightly browned at the edges.
4. While the cauliflower roasts, in a medium mixing bowl, combine the softened cream cheese, sour cream, and buffalo sauce, stirring until smooth—a tip here: letting the cream cheese sit at room temperature for 30 minutes beforehand makes blending much easier.
5. Once the cauliflower is done, remove it from the oven and let it cool for 5 minutes to prevent curdling the dairy.
6. Transfer the roasted cauliflower to a food processor and pulse 5-7 times until broken down into small pieces but not pureed, which helps maintain a chunky texture.
7. Fold the processed cauliflower into the cream cheese mixture until well combined.
8. Transfer the dip to an oven-safe dish and top evenly with shredded cheddar cheese.
9. Bake at 400°F for 15 minutes, or until the cheese is melted and bubbly with golden spots.
10. Remove from the oven and let it cool for 5 minutes before garnishing with sliced green onions.
11. For best results, serve immediately while warm to enjoy the creamy, gooey consistency.
For me, this dip hits all the right notes with its creamy base giving way to tender cauliflower bits and a bold buffalo flavor that’s not overly spicy. I love scooping it up with celery sticks or thick-cut potato chips for a satisfying crunch that complements the rich texture perfectly—it’s so addictive, you might just skip the main course!
Herbed Chickpea Yogurt Dip
Remember those holiday parties where you’re scrambling for a last-minute appetizer that’s both impressive and easy? I’ve been there, and that’s exactly why this Herbed Chickpea Yogurt Dip became my go-to. It’s a creamy, flavorful lifesaver that comes together in minutes, perfect for when you need something delicious without the fuss.
Serving: 6 | Pre Time: 10 minutes | Cooking Time: 0 minutes
Ingredients
– 2 (15-ounce) cans chickpeas, drained and rinsed
– 1 cup plain Greek yogurt
– 1/4 cup fresh lemon juice
– 1/4 cup extra-virgin olive oil
– 3 cloves garlic, minced
– 1/4 cup fresh parsley, finely chopped
– 2 tablespoons fresh dill, finely chopped
– 1 teaspoon salt
– 1/2 teaspoon black pepper
– 1/4 teaspoon red pepper flakes (optional)
Instructions
1. Add the drained and rinsed chickpeas to a food processor or high-speed blender.
2. Pour in the plain Greek yogurt, fresh lemon juice, and extra-virgin olive oil.
3. Add the minced garlic, finely chopped fresh parsley, and finely chopped fresh dill to the mixture.
4. Sprinkle in the salt, black pepper, and red pepper flakes (if using).
5. Process all ingredients on high speed for 45-60 seconds, stopping to scrape down the sides with a spatula halfway through, until completely smooth and creamy. Tip: For an extra-smooth texture, let the dip rest for 10 minutes after blending to allow the flavors to meld.
6. Transfer the dip to a serving bowl using a spatula. Tip: Drizzle a little extra olive oil on top and garnish with additional fresh herbs for a beautiful presentation.
7. Serve immediately or cover and refrigerate for up to 2 hours before serving to let it chill. Tip: If making ahead, store in an airtight container; the dip thickens slightly when cold, so you might stir in a teaspoon of water or lemon juice to loosen it before serving.
Decadently creamy with a bright, herby kick, this dip has a lush texture that’s perfect for scooping with pita chips or fresh veggies. I love how the garlic and lemon shine through, making it a refreshing alternative to heavier holiday spreads—try it as a sandwich spread or dolloped on grilled chicken for an easy weeknight upgrade.
Beetroot and Walnut Dip
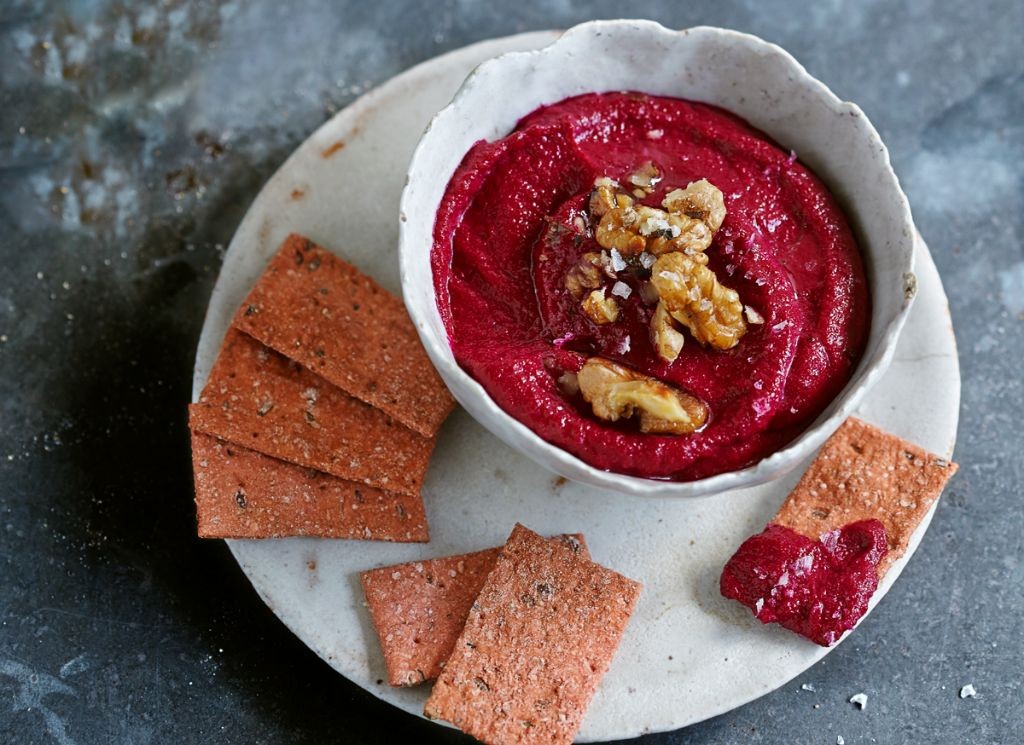
Last weekend, while rummaging through my fridge for a colorful snack to bring to a holiday potluck, I rediscovered a forgotten bunch of beets—and this vibrant dip was born. It’s become my go‑up for using up roasted beets, and the walnuts add a lovely crunch that reminds me of my grandma’s kitchen.
Serving: 6 | Pre Time: 15 minutes | Cooking Time: 60 minutes
Ingredients
– 2 medium beetroots (about 1 lb)
– 1/2 cup walnut halves
– 1/4 cup plain Greek yogurt
– 2 tbsp extra‑virgin olive oil
– 1 tbsp lemon juice
– 1 small garlic clove
– 1/2 tsp salt
– 1/4 tsp ground black pepper
Instructions
1. Preheat your oven to 400°F and line a baking sheet with parchment paper.
2. Scrub the beetroots thoroughly under cold water to remove any dirt, then pat them dry with a clean towel.
3. Wrap each beetroot tightly in aluminum foil and place them on the prepared baking sheet.
4. Roast the wrapped beetroots in the preheated oven for 50–60 minutes, until a fork pierces them easily.
5. While the beetroots roast, spread the walnut halves in a single layer on a separate baking sheet.
6. Toast the walnuts in the oven at 400°F for 5–7 minutes, watching closely to prevent burning—they’re done when fragrant and lightly browned.
7. Let the roasted beetroots cool until safe to handle, then use your hands to peel off the skins; they should slip off easily.
8. Roughly chop the peeled beetroots into chunks and add them to a food processor.
9. Add the toasted walnuts, Greek yogurt, olive oil, lemon juice, garlic clove, salt, and black pepper to the food processor.
10. Pulse the mixture for 30–45 seconds, scraping down the sides once, until it reaches a smooth but slightly chunky consistency.
11. Transfer the dip to a serving bowl and refrigerate it for at least 30 minutes to let the flavors meld.
Hearty and earthy, this dip has a creamy texture with a subtle crunch from the walnuts, making it perfect for spreading on crackers or as a bold sandwich spread. I love pairing it with crisp apple slices for a sweet contrast that really makes the flavors pop.
Spiced Sweet Potato and Peanut Butter Dip

A cozy evening last week had me craving something warm, sweet, and a little unexpected—so I whipped up this Spiced Sweet Potato and Peanut Butter Dip, which has quickly become my go-to for holiday gatherings or a simple snack. Honestly, it’s the kind of recipe that feels both indulgent and wholesome, perfect for when you want to impress without stressing.
Serving: 6 | Pre Time: 15 minutes | Cooking Time: 45 minutes
Ingredients
– 2 large sweet potatoes (about 2 pounds)
– 1/2 cup creamy peanut butter
– 2 tablespoons maple syrup
– 1 tablespoon olive oil
– 1 teaspoon ground cinnamon
– 1/2 teaspoon ground ginger
– 1/4 teaspoon salt
– 1/4 cup water
Instructions
1. Preheat your oven to 400°F and line a baking sheet with parchment paper.
2. Pierce the sweet potatoes all over with a fork—this helps steam escape and prevents bursting.
3. Place the sweet potatoes on the baking sheet and roast for 45 minutes, or until they are tender when pierced with a fork.
4. Remove the sweet potatoes from the oven and let them cool for 10 minutes until safe to handle.
5. Cut the sweet potatoes in half lengthwise and scoop the flesh into a food processor, discarding the skins.
6. Add the peanut butter, maple syrup, olive oil, cinnamon, ginger, and salt to the food processor.
7. Process the mixture on high speed for 1 minute, scraping down the sides with a spatula to ensure everything is combined.
8. While the processor is running, slowly pour in the water through the feed tube until the dip reaches a smooth, creamy consistency.
9. Transfer the dip to a serving bowl and let it sit at room temperature for 5 minutes to allow the flavors to meld.
10. Serve immediately or refrigerate in an airtight container for up to 3 days.
Using a food processor makes this dip incredibly silky, but if you prefer a chunkier texture, you can mash it by hand. Ultimately, this dip is wonderfully creamy with a rich, nutty sweetness from the peanut butter balanced by warm spices—try it with apple slices or spread on toast for a delightful twist.
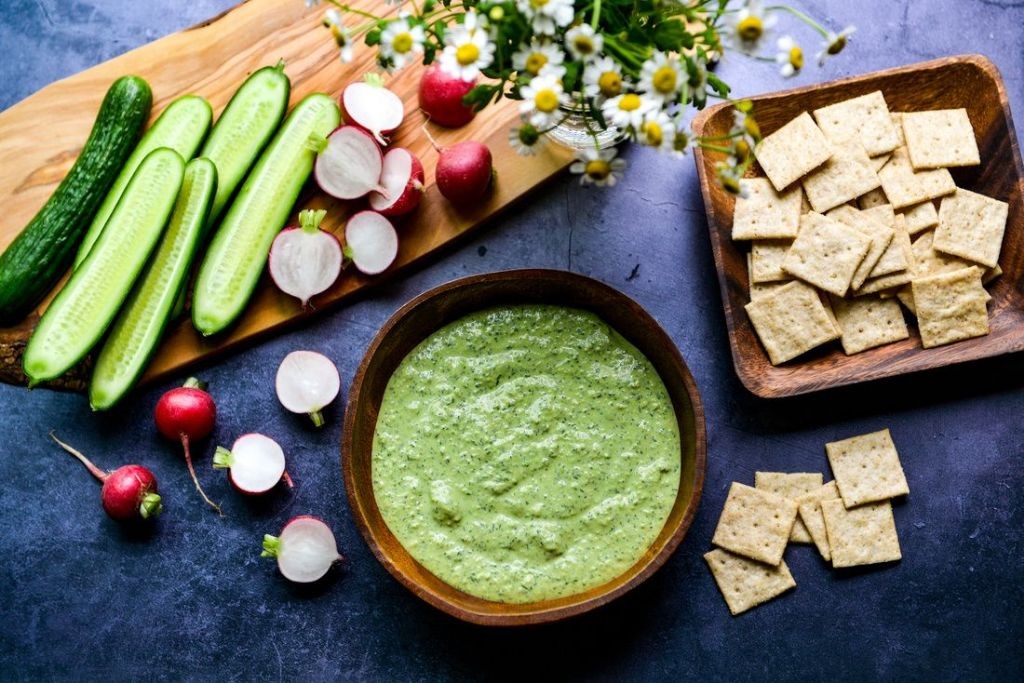
Green Goddess Avocado Dip

Last week, when my friends dropped by unexpectedly for game night, I realized I had nothing ready to snack on—so I whipped up this creamy Green Goddess Avocado Dip with whatever I had in the fridge, and it was such a hit that I’ve been making it weekly ever since. It’s the perfect blend of fresh herbs and rich avocado that feels indulgent yet light, and I love how versatile it is for dipping veggies or spreading on toast. Honestly, it’s become my go-to for quick gatherings because it comes together in minutes and always disappears fast!
Serving: 6 | Pre Time: 15 minutes | Cooking Time: 0 minutes
Ingredients
– 2 ripe avocados
– 1/2 cup plain Greek yogurt
– 1/4 cup fresh basil leaves
– 1/4 cup fresh parsley leaves
– 2 tbsp fresh chives
– 2 tbsp lemon juice
– 1 tbsp olive oil
– 1 garlic clove
– 1/2 tsp salt
– 1/4 tsp black pepper
Instructions
1. Cut the 2 ripe avocados in half, remove the pits, and scoop the flesh into a food processor or blender.
2. Add the 1/2 cup plain Greek yogurt, 1/4 cup fresh basil leaves, 1/4 cup fresh parsley leaves, 2 tbsp fresh chives, 2 tbsp lemon juice, 1 tbsp olive oil, 1 garlic clove, 1/2 tsp salt, and 1/4 tsp black pepper to the food processor.
3. Blend all ingredients on medium speed for 30 seconds until roughly combined, then scrape down the sides with a spatula to ensure even mixing.
4. Blend again on high speed for 1 minute until the dip is completely smooth and creamy, with no visible herb chunks.
5. Taste the dip and adjust seasoning if needed, but avoid over-blending to prevent it from becoming too runny.
6. Transfer the dip to a serving bowl and cover it with plastic wrap, pressing the wrap directly onto the surface to prevent browning.
7. Refrigerate the dip for at least 30 minutes to allow the flavors to meld and the texture to thicken slightly.
8. Serve chilled with your choice of dippers like carrot sticks, tortilla chips, or sliced bell peppers.
But this dip isn’t just creamy—it has a vibrant, herby kick from the basil and parsley that pairs beautifully with the subtle tang of Greek yogurt. I often spread it on grilled chicken or use it as a sandwich spread for an extra burst of flavor, and its bright green color makes it a festive addition to any table!
Roasted Red Pepper Cashew Dip

Whenever I’m craving something creamy, savory, and a little smoky, this roasted red pepper cashew dip is my go-to. It’s the perfect blend of rich cashews and sweet, charred peppers, and it comes together in minutes—ideal for last-minute gatherings or a cozy night in. I love how versatile it is; you can adjust the garlic or lemon to suit your mood, and it always feels like a special treat.
Serving: 6 | Pre Time: 10 minutes | Cooking Time: 20 minutes
Ingredients
– 1 cup raw cashews
– 2 large red bell peppers
– 2 cloves garlic
– 3 tablespoons olive oil
– 2 tablespoons lemon juice
– 1 teaspoon smoked paprika
– 1/2 teaspoon salt
– 1/4 teaspoon black pepper
– 2 tablespoons water
Instructions
1. Place 1 cup raw cashews in a bowl, cover with hot water, and let soak for 30 minutes to soften them for blending.
2. Preheat your oven to 425°F and line a baking sheet with parchment paper.
3. Cut 2 large red bell peppers in half, remove the stems and seeds, and place them cut-side down on the baking sheet.
4. Drizzle the peppers with 1 tablespoon olive oil and roast in the oven for 20 minutes, until the skins are blackened and blistered.
5. Remove the peppers from the oven, transfer to a bowl, cover with plastic wrap, and let steam for 10 minutes to loosen the skins—this makes peeling easier.
6. Peel the skins off the peppers and discard them.
7. Drain the soaked cashews and add them to a blender.
8. Add the peeled roasted peppers, 2 cloves garlic, remaining 2 tablespoons olive oil, 2 tablespoons lemon juice, 1 teaspoon smoked paprika, 1/2 teaspoon salt, 1/4 teaspoon black pepper, and 2 tablespoons water to the blender.
9. Blend on high speed for 2–3 minutes, scraping down the sides as needed, until the mixture is completely smooth and creamy.
10. Taste and adjust seasoning if necessary, then transfer the dip to a serving bowl.
For a silky texture, blend a bit longer if it feels grainy. This dip has a luscious, velvety consistency with a sweet-smoky flavor from the roasted peppers and a hint of tang from the lemon. Serve it with veggie sticks, pita chips, or spread it on sandwiches for an extra burst of flavor.
Caramelized Onion and Lentil Dip
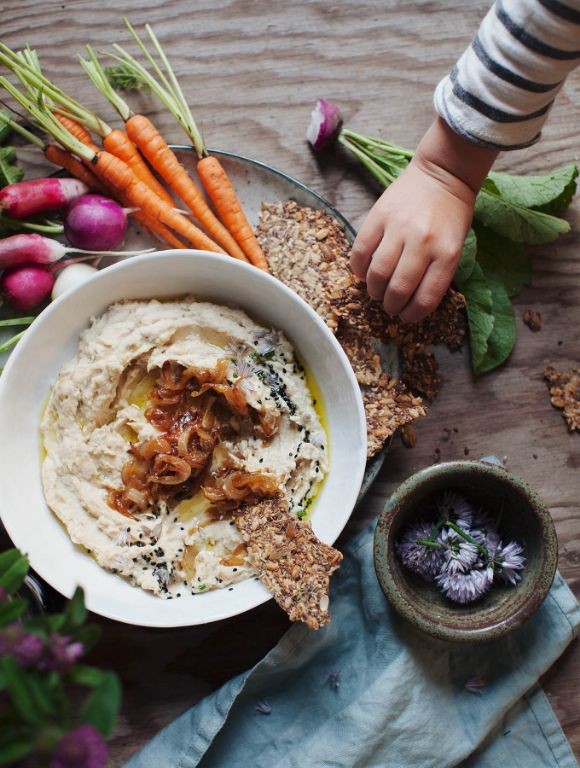
A cozy winter evening last week had me craving something warm, savory, and perfect for sharing with friends—enter this Caramelized Onion and Lentil Dip. I love how its rich, sweet onion flavor pairs with earthy lentils, creating a dip that feels both comforting and a bit sophisticated, like something you’d find at a rustic-charcuterie board gathering. It’s become my go-to for potlucks because it’s easy to make ahead and always disappears fast.
Serving: 6 | Pre Time: 10 minutes | Cooking Time: 45 minutes
Ingredients
– 2 tablespoons olive oil
– 2 large yellow onions, thinly sliced
– 1 teaspoon salt
– 1 cup brown lentils, rinsed
– 2 cups vegetable broth
– 1 cup sour cream
– 1/2 cup grated Parmesan cheese
– 1 tablespoon fresh lemon juice
– 1/4 teaspoon black pepper
Instructions
1. Heat 2 tablespoons olive oil in a large skillet over medium-low heat.
2. Add 2 large thinly sliced yellow onions and 1 teaspoon salt to the skillet, stirring to coat.
3. Cook the onions for 30–35 minutes, stirring every 5–7 minutes, until they turn deep golden brown and caramelized—this low-and-slow method builds flavor without burning.
4. While the onions cook, combine 1 cup rinsed brown lentils and 2 cups vegetable broth in a medium saucepan.
5. Bring the lentil mixture to a boil over high heat, then reduce to a simmer and cook uncovered for 20–25 minutes, until the lentils are tender but not mushy.
6. Drain any excess liquid from the cooked lentils and let them cool slightly for 5 minutes.
7. Transfer the caramelized onions, cooked lentils, 1 cup sour cream, 1/2 cup grated Parmesan cheese, 1 tablespoon fresh lemon juice, and 1/4 teaspoon black pepper to a food processor.
8. Pulse the mixture 10–12 times until mostly smooth but with some texture, scraping down the sides as needed—overprocessing can make it gluey.
9. Taste and adjust seasoning if desired, then transfer the dip to a serving bowl.
10. Serve the dip warm or at room temperature, garnished with extra Parmesan if you like.
Ultra creamy with a subtle crunch from the lentils, this dip has a sweet-savory balance that’s irresistible with toasted pita chips or crisp veggie sticks. I sometimes swirl in a spoonful of Greek yogurt for extra tang or top it with fresh herbs like thyme for a pop of color—it’s versatile enough to make your own!
Coconut Curry Lentil Dip

This cozy coconut curry lentil dip has become my go-to for casual gatherings, especially during the chilly holiday season. There’s something incredibly comforting about its warm, aromatic spices that fills the kitchen and welcomes guests. I love how it comes together with mostly pantry staples, making it a lifesaver when I need a quick, impressive appetizer.
Serving: 6 | Pre Time: 10 minutes | Cooking Time: 25 minutes
Ingredients
– 1 tbsp olive oil
– 1 small yellow onion, finely diced
– 2 cloves garlic, minced
– 1 tbsp fresh ginger, grated
– 1 tbsp curry powder
– 1 tsp ground cumin
– 1/4 tsp cayenne pepper
– 1 cup red lentils, rinsed
– 1 (13.5 oz) can full-fat coconut milk
– 1 1/2 cups vegetable broth
– 1 tbsp fresh lime juice
– 1/4 cup fresh cilantro, chopped
– Salt to taste
Instructions
1. Heat 1 tbsp olive oil in a medium saucepan over medium heat until shimmering, about 1 minute.
2. Add 1 small finely diced yellow onion and cook, stirring frequently, until softened and translucent, about 5 minutes.
3. Stir in 2 minced garlic cloves and 1 tbsp grated fresh ginger, cooking for 1 minute until fragrant.
4. Add 1 tbsp curry powder, 1 tsp ground cumin, and 1/4 tsp cayenne pepper, toasting the spices with the onion mixture for 30 seconds to deepen their flavor.
5. Pour in 1 cup rinsed red lentils, 1 can coconut milk, and 1 1/2 cups vegetable broth, stirring to combine.
6. Increase heat to bring the mixture to a boil, then immediately reduce to a simmer.
7. Cover the saucepan and let simmer for 20 minutes, stirring occasionally to prevent sticking, until the lentils are completely tender and have absorbed most of the liquid.
8. Remove the saucepan from the heat and stir in 1 tbsp fresh lime juice and 1/4 cup chopped fresh cilantro.
9. Season the dip with salt, starting with 1/2 tsp and adjusting as needed.
10. Transfer the dip to a serving bowl and let it cool for 5 minutes before serving to allow the flavors to meld.
Just creamy enough to cling to a chip but thick enough to scoop, this dip boasts a beautiful balance of earthy lentils, rich coconut, and warm spices. The fresh lime and cilantro brighten every bite, making it irresistible with pita chips, veggie sticks, or even as a spread on sandwiches. For a festive touch, I sometimes top it with a drizzle of coconut milk and extra cilantro before serving.
Pumpkin Seed Pesto Dip
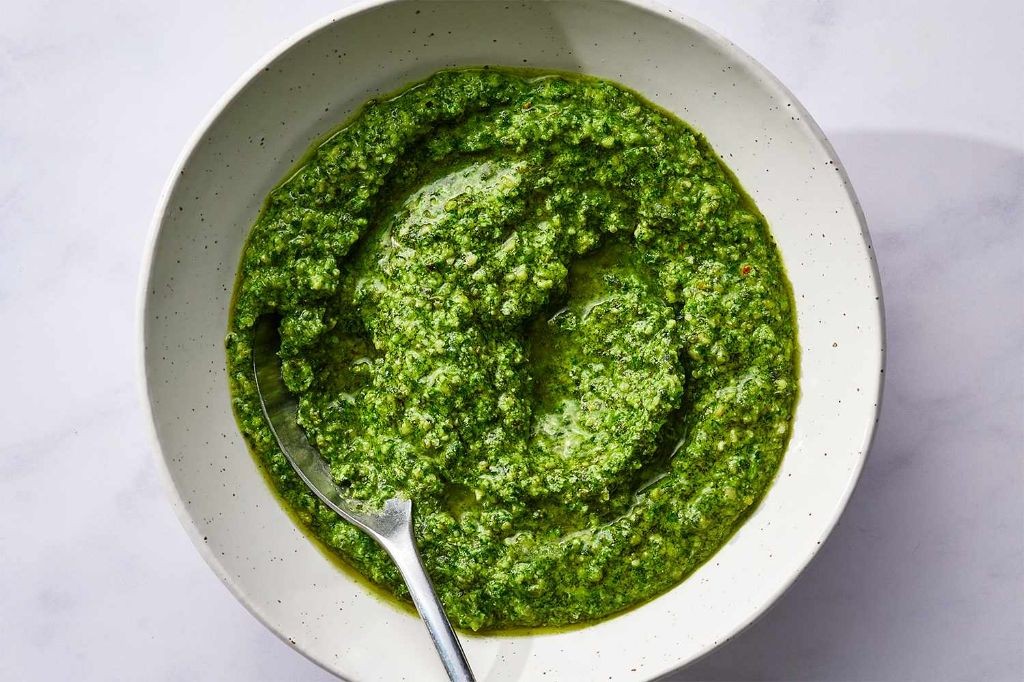
A cozy holiday gathering last week reminded me how much I love a good dip—something vibrant, easy to whip up, and a little unexpected. That’s where this pumpkin seed pesto dip comes in; it’s my go-to when I want to impress without spending hours in the kitchen, and it always disappears fast from the snack table.
Serving: 6 | Pre Time: 10 minutes | Cooking Time: 0 minutes
Ingredients
– 1 cup raw pumpkin seeds
– 2 cloves garlic
– 1/2 cup fresh basil leaves
– 1/4 cup grated Parmesan cheese
– 1/3 cup olive oil
– 2 tbsp lemon juice
– 1/2 tsp salt
– 1/4 tsp black pepper
Instructions
1. Toast 1 cup raw pumpkin seeds in a dry skillet over medium heat for 5–7 minutes, stirring frequently, until they turn golden brown and become fragrant to enhance their nutty flavor. 2. Transfer the toasted pumpkin seeds to a food processor and let them cool for 2 minutes to prevent the pesto from becoming too warm. 3. Add 2 cloves garlic, 1/2 cup fresh basil leaves, 1/4 cup grated Parmesan cheese, 1/2 tsp salt, and 1/4 tsp black pepper to the food processor. 4. Pulse the ingredients 10–15 times until coarsely chopped, scraping down the sides with a spatula halfway through to ensure even mixing. 5. With the food processor running on low speed, slowly drizzle in 1/3 cup olive oil through the feed tube until the mixture forms a thick, cohesive paste. 6. Add 2 tbsp lemon juice to the food processor and pulse 3–5 times just until combined, being careful not to overmix to maintain a slightly chunky texture. 7. Transfer the dip to a serving bowl and let it sit at room temperature for 10 minutes to allow the flavors to meld together. 8. Serve the dip immediately or cover and refrigerate for up to 3 days, bringing it to room temperature before serving for the best consistency.
Kick back and enjoy this dip—it’s wonderfully creamy with a satisfying crunch from the seeds, and the garlic and basil give it a fresh, herbaceous punch that pairs perfectly with veggie sticks or crusty bread. I love spreading it on sandwiches or using it as a quick pasta sauce for a weeknight dinner twist.
Mushroom and Walnut Pâté
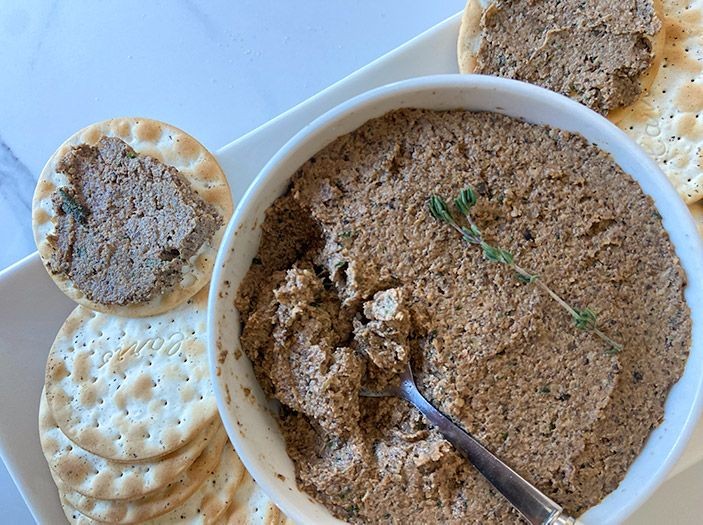
Holiday entertaining always has me looking for impressive yet easy appetizers, and this mushroom and walnut pâté has become my go-to. I first made it for a last-minute Friendsgiving a few years back when I realized I had forgotten to buy a cheese board, and it was such a hit that my friends now request it every year. It’s rich, savory, and feels fancy, but comes together in my food processor with minimal fuss—perfect for when you want to look like you spent all day in the kitchen without actually doing so.
Serving: 8 | Pre Time: 15 minutes | Cooking Time: 20 minutes
Ingredients
– 2 tbsp unsalted butter
– 1 tbsp olive oil
– 1 lb cremini mushrooms, sliced
– 1/2 cup yellow onion, finely chopped
– 2 cloves garlic, minced
– 1 cup walnuts
– 1/4 cup fresh parsley, chopped
– 1 tbsp fresh thyme leaves
– 1 tbsp lemon juice
– 1/4 tsp salt
– 1/4 tsp black pepper
Instructions
1. Heat 2 tbsp unsalted butter and 1 tbsp olive oil in a large skillet over medium heat until the butter melts and foams slightly, about 2 minutes.
2. Add 1/2 cup finely chopped yellow onion to the skillet and cook, stirring occasionally, until translucent and soft, about 5 minutes.
3. Stir in 2 cloves minced garlic and cook for 1 minute until fragrant, being careful not to let it burn.
4. Add 1 lb sliced cremini mushrooms to the skillet, spreading them in an even layer to ensure they brown properly.
5. Cook the mushrooms, stirring every 3-4 minutes, until they release their liquid, it evaporates, and the mushrooms turn deep golden brown, about 10-12 minutes total.
6. Transfer the cooked mushroom mixture to a food processor and let it cool for 5 minutes to prevent the machine from overheating.
7. Add 1 cup walnuts, 1/4 cup chopped fresh parsley, 1 tbsp fresh thyme leaves, 1 tbsp lemon juice, 1/4 tsp salt, and 1/4 tsp black pepper to the food processor.
8. Pulse the mixture 10-12 times in 1-second bursts, then scrape down the sides with a spatula to incorporate any large pieces.
9. Process the mixture on high speed for 45-60 seconds until it forms a coarse, spreadable paste, stopping to scrape the sides once halfway through.
10. Spoon the pâté into a serving bowl, cover with plastic wrap pressed directly onto the surface, and refrigerate for at least 1 hour to allow the flavors to meld.
Now, this pâté firms up beautifully in the fridge, developing a creamy yet textured spread that’s packed with earthy, nutty depth from the mushrooms and walnuts. I love serving it with crisp apple slices or toasted baguette rounds for a contrast in textures, and a drizzle of honey on top adds a lovely sweet note that balances the savory richness perfectly.
Turmeric and White Bean Hummus

Now, I’ll admit I’m a bit of a hummus fanatic—my fridge always has at least one tub, but this turmeric and white bean version has become my go‑to for its vibrant color and earthy flavor. It’s a twist I stumbled on during a pantry clean‑out, and it’s been a hit at every gathering since.
Serving: 6 | Pre Time: 10 minutes | Cooking Time: 0 minutes
Ingredients
– 2 (15‑ounce) cans cannellini beans, drained and rinsed
– ⅓ cup tahini
– ¼ cup fresh lemon juice
– 3 tablespoons extra‑virgin olive oil
– 2 garlic cloves, peeled
– 1 tablespoon ground turmeric
– 1 teaspoon ground cumin
– ½ teaspoon salt
– ¼ teaspoon black pepper
– 2‑3 tablespoons ice water
Instructions
1. Add the drained and rinsed cannellini beans, tahini, lemon juice, olive oil, garlic cloves, turmeric, cumin, salt, and black pepper to a food processor.
2. Process the mixture on high speed for 1 minute, scraping down the sides with a spatula halfway through to ensure everything is incorporated evenly.
3. With the processor running on low, slowly drizzle in 2 tablespoons of ice water through the feed tube and process for 30 seconds until smooth. Tip: The ice water helps create a light, creamy texture without making the hummus runny.
4. Check the consistency; if it’s too thick, add the remaining 1 tablespoon of ice water and process for another 15‑20 seconds until it reaches your desired creaminess. Tip: For the best flavor, let the hummus rest at room temperature for 10 minutes before serving to allow the spices to meld.
5. Transfer the hummus to a serving bowl and drizzle with a little extra olive oil if desired. Tip: To prevent discoloration from the turmeric, store any leftovers in an airtight container in the refrigerator for up to 5 days.
Creating this hummus yields a velvety, golden‑hued dip with a warm, earthy undertone from the turmeric and a subtle nuttiness from the white beans. I love it spread on toasted pita or as a vibrant base for veggie platters—it’s a colorful upgrade that always sparks conversation.
Summary
From casual gatherings to elegant parties, these 20 creamy vegan dips prove that plant-based eating can be deliciously indulgent. We hope you find a new favorite to share with friends and family! Give a recipe a try, leave a comment telling us which one you loved, and don’t forget to pin this roundup to your Pinterest boards for easy reference. Happy dipping!


