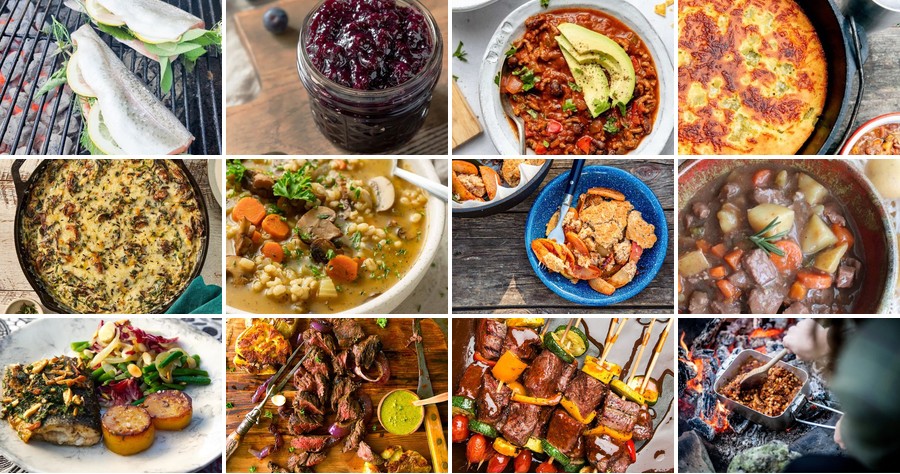
Nestled between the geysers and grizzlies of Yellowstone lies a culinary treasure trove. We’ve gathered 17 hearty, nature-inspired recipes from the Yellowstone Cookbook—think rustic stews, campfire breads, and wild berry desserts. Perfect for cozy nights or weekend feasts, these dishes bring the park’s rugged charm right to your kitchen. Ready to cook up some wilderness magic? Let’s dive in!
Smoked Trout with Lemon Butter
Elegantly simple yet profoundly flavorful, smoked trout with lemon butter is a dish that transforms humble ingredients into a sophisticated centerpiece. The delicate smokiness of the trout pairs exquisitely with the bright, rich sauce, creating a harmony that feels both rustic and refined. Perfect for a special dinner or an impressive weeknight meal, this recipe delivers restaurant-quality results with approachable techniques.
Serving: 4 | Pre Time: 15 minutes | Cooking Time: 20 minutes
Ingredients
– 4 (6-ounce) skin-on smoked trout fillets
– ½ cup unsalted butter, cubed and chilled
– ¼ cup freshly squeezed lemon juice
– 2 tablespoons finely chopped fresh dill
– 1 tablespoon extra-virgin olive oil
– 1 teaspoon finely grated lemon zest
– ½ teaspoon kosher salt
– ¼ teaspoon freshly cracked black pepper
– 1 lemon, thinly sliced into rounds for garnish
Instructions
1. Preheat your oven to 375°F and line a rimmed baking sheet with parchment paper.
2. Pat the smoked trout fillets completely dry with paper towels to ensure a crisp exterior.
3. Arrange the trout fillets skin-side down on the prepared baking sheet, spacing them evenly.
4. Drizzle the extra-virgin olive oil evenly over the top of each fillet.
5. Season the fillets uniformly with the kosher salt and freshly cracked black pepper.
6. Bake the trout in the preheated oven for 12-15 minutes, until the flesh flakes easily with a fork.
7. While the trout bakes, prepare the lemon butter sauce: combine the chilled butter cubes, freshly squeezed lemon juice, and finely grated lemon zest in a small saucepan.
8. Heat the mixture over medium-low heat, whisking constantly, until the butter is fully melted and emulsified, about 3-4 minutes. Tip: Maintain a gentle heat to prevent the sauce from breaking.
9. Remove the saucepan from the heat and immediately stir in the finely chopped fresh dill.
10. Once the trout is baked, transfer the fillets to serving plates using a thin spatula to keep them intact.
11. Spoon the warm lemon butter sauce generously over each trout fillet. Tip: Serve the sauce immediately for optimal texture and flavor.
12. Garnish each plate with the thinly sliced lemon rounds for a fresh, vibrant presentation. Tip: For added depth, lightly char the lemon slices in a dry skillet for 30 seconds before garnishing.
13. Serve the dish immediately while the trout is hot and the sauce is velvety.
Here, the trout remains moist and flaky beneath its lightly crisped skin, enveloped in a sauce that balances citrusy sharpness with luxurious richness. The fresh dill and lemon garnish cut through the butter’s decadence, making each bite complex yet clean. Consider serving it over a bed of wilted spinach or alongside roasted fingerling potatoes to soak up every last drop of the vibrant sauce.
Elk Steak with Rosemary Garlic Rub
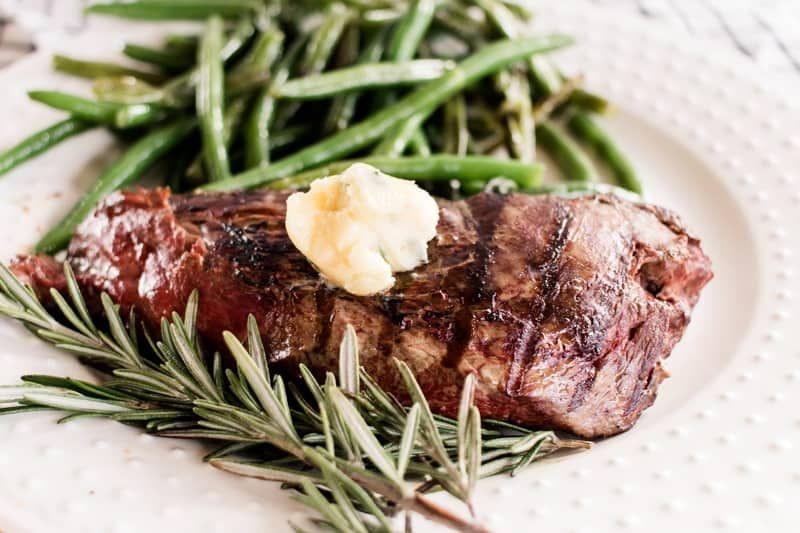
A majestic centerpiece for holiday gatherings, this elk steak with rosemary garlic rub transforms wild game into an elegant feast, its robust flavor elevated by aromatic herbs and precise cooking techniques. Sourced from sustainable ranches, the lean yet tender cut offers a sophisticated alternative to traditional beef, promising a memorable dining experience that honors both nature and culinary artistry.
Serving: 4 | Pre Time: 15 minutes | Cooking Time: 12 minutes
Ingredients
– 2 pounds elk loin steak, 1½ inches thick
– 3 tablespoons extra-virgin olive oil
– 4 cloves garlic, finely minced
– 2 tablespoons fresh rosemary leaves, finely chopped
– 1 teaspoon flaky sea salt
– ½ teaspoon freshly cracked black pepper
– 2 tablespoons clarified butter
– ½ cup dry red wine (such as Cabernet Sauvignon)
– ¼ cup beef demi-glace
Instructions
1. Pat the elk loin steak completely dry with paper towels to ensure proper searing.
2. In a small bowl, combine the extra-virgin olive oil, minced garlic, chopped rosemary, flaky sea salt, and cracked black pepper to create the rub.
3. Massage the rub evenly over all surfaces of the steak, coating it thoroughly.
4. Allow the steak to rest at room temperature for 10 minutes to temper the meat.
5. Preheat a cast-iron skillet over medium-high heat until it begins to smoke lightly, about 3 minutes.
6. Add the clarified butter to the hot skillet, swirling to coat the surface.
7. Place the steak in the skillet and sear undisturbed for 4 minutes to develop a deep golden-brown crust.
8. Flip the steak using tongs and sear the opposite side for 4 minutes.
9. Insert a meat thermometer into the thickest part of the steak and cook until it registers 125°F for medium-rare, about 2-4 additional minutes.
10. Transfer the steak to a cutting board and tent loosely with foil, letting it rest for 8 minutes to redistribute juices.
11. While the steak rests, pour the dry red wine into the skillet to deglaze, scraping up any browned bits with a wooden spoon.
12. Add the beef demi-glace to the skillet and simmer until the sauce reduces by half, about 3 minutes.
13. Slice the steak against the grain into ½-inch thick portions.
14. Arrange the sliced steak on a warmed platter and drizzle with the red wine reduction.
Buttery and tender with a subtle gaminess, the steak’s crust yields to a juicy, rosy interior, while the rosemary-garlic rub infuses each bite with earthy fragrance. For an elegant presentation, serve alongside roasted root vegetables and a bold red wine, allowing the rich sauce to unite all elements on the plate.
Campfire Dutch Oven Stew
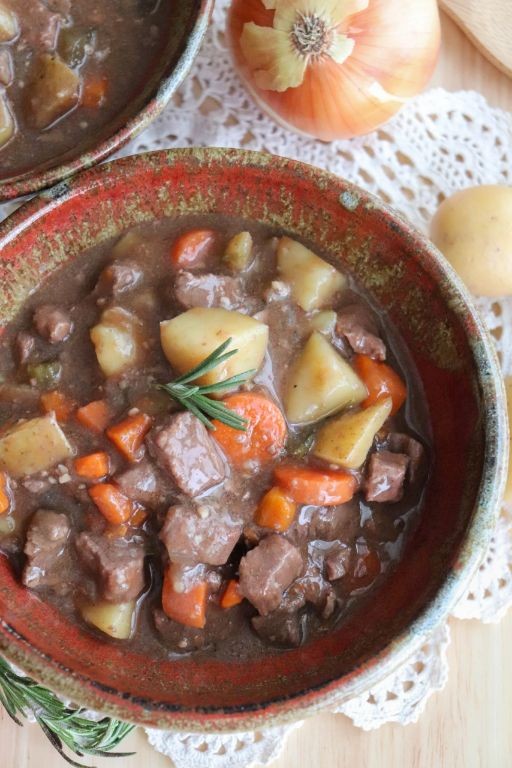
Draped in the nostalgic aroma of woodsmoke and hearty comfort, this Campfire Dutch Oven Stew transforms humble ingredients into a rustic masterpiece. It’s a celebration of slow-cooked depth, where each component melds into a rich, soul-warming broth perfect for gathering around on a crisp evening. The process is as rewarding as the result, a meditative dance of building layers of flavor over glowing embers.
Serving: 6 | Pre Time: 20 minutes | Cooking Time: 2 hours 30 minutes
Ingredients
– 2 lbs beef chuck roast, cut into 1-inch cubes
– 3 tbsp clarified butter
– 1 large yellow onion, finely diced
– 3 cloves garlic, minced
– 2 large carrots, peeled and cut into ½-inch rounds
– 2 stalks celery, cut into ½-inch pieces
– 1 lb Yukon Gold potatoes, peeled and cut into 1-inch cubes
– 4 cups beef stock
– 1 cup dry red wine
– 2 tbsp tomato paste
– 2 sprigs fresh rosemary
– 3 sprigs fresh thyme
– 1 bay leaf
– Kosher salt and freshly cracked black pepper
Instructions
1. Pat the beef chuck roast cubes completely dry with paper towels and season generously on all sides with kosher salt and freshly cracked black pepper.
2. Heat a 6-quart Dutch oven over medium-high heat and add 2 tablespoons of clarified butter until shimmering, about 1 minute.
3. Sear the beef cubes in a single layer, undisturbed, for 4–5 minutes per side until a deep brown crust forms, working in batches to avoid overcrowding.
4. Transfer the seared beef to a clean plate and reduce the heat to medium.
5. Add the remaining 1 tablespoon of clarified butter to the Dutch oven, then add the finely diced yellow onion, cooking for 5–7 minutes until translucent and lightly caramelized.
6. Stir in the minced garlic and cook for 1 minute until fragrant.
7. Add the carrot rounds and celery pieces, cooking for 4–5 minutes until slightly softened.
8. Pour in the dry red wine to deglaze the pot, using a wooden spoon to scrape up any browned bits from the bottom, and simmer for 3 minutes until reduced by half.
9. Stir in the tomato paste and cook for 1 minute to deepen its flavor.
10. Return the seared beef and any accumulated juices to the Dutch oven.
11. Add the peeled Yukon Gold potato cubes, beef stock, fresh rosemary sprigs, fresh thyme sprigs, and bay leaf, ensuring the liquid just covers the ingredients.
12. Bring the stew to a gentle boil over high heat, then immediately reduce to a low simmer, cover, and cook for 2 hours, stirring occasionally, until the beef is fork-tender.
13. After 2 hours, uncover and simmer for an additional 30 minutes to slightly thicken the broth.
14. Discard the rosemary sprigs, thyme sprigs, and bay leaf, then season the stew with additional kosher salt and freshly cracked black pepper to your preference.
Hearty and robust, this stew boasts tender beef that falls apart at the touch of a spoon, nestled in a velvety, wine-infused broth with perfectly softened vegetables. For a creative twist, serve it over a bed of creamy polenta or with crusty, buttered sourdough to soak up every last drop of its rich essence.
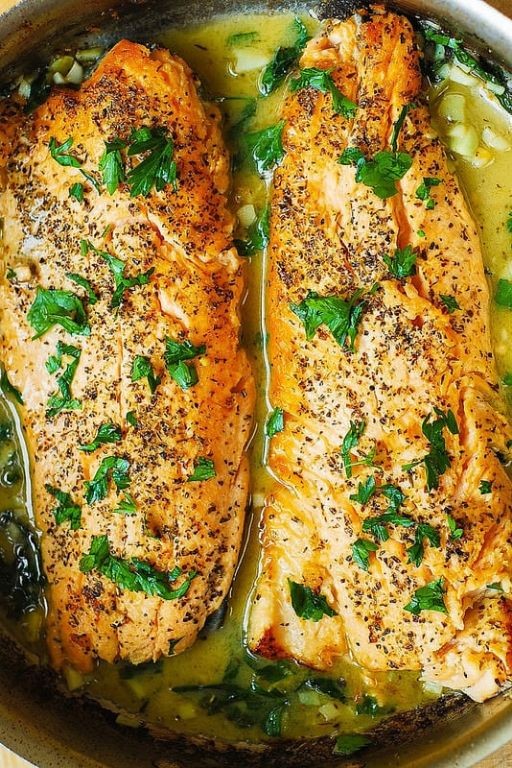
Grilled Rainbow Trout with Herbs
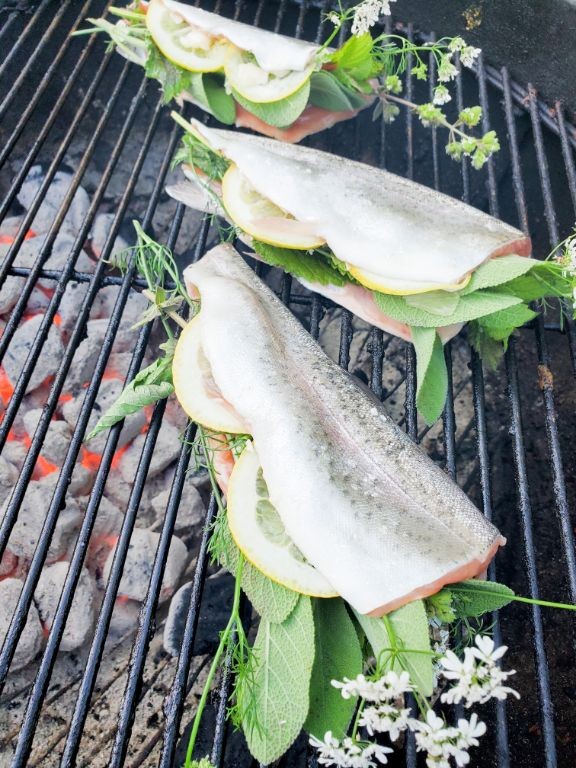
Tender, flaky rainbow trout, kissed by the flames of a hot grill and perfumed with a bouquet of fresh herbs, offers a sublime centerpiece for any elegant summer gathering. This recipe celebrates the fish’s delicate, sweet flesh with a simple yet sophisticated preparation that allows its natural flavors to shine, resulting in a dish that is both impressive and surprisingly approachable. The aromatic herbs and a touch of citrus create a harmonious balance, elevating this freshwater favorite to new culinary heights.
Serving: 4 | Pre Time: 15 minutes | Cooking Time: 12 minutes
Ingredients
– 4 (6-ounce) rainbow trout fillets, skin-on and pin bones removed
– 3 tablespoons extra-virgin olive oil
– 2 tablespoons freshly squeezed lemon juice
– 4 sprigs fresh thyme, leaves stripped
– 2 tablespoons finely chopped fresh flat-leaf parsley
– 1 tablespoon finely chopped fresh dill
– 1 teaspoon kosher salt
– ½ teaspoon freshly cracked black pepper
– 1 lemon, cut into 4 wedges for serving
Instructions
1. Preheat a gas or charcoal grill to medium-high heat, approximately 400°F, ensuring the grates are clean and lightly oiled to prevent sticking.
2. Pat the rainbow trout fillets completely dry with paper towels to ensure a crisp skin.
3. In a small bowl, whisk together the extra-virgin olive oil and freshly squeezed lemon juice to form an emulsion.
4. Brush both sides of each trout fillet generously with the lemon-olive oil emulsion.
5. In a separate small bowl, combine the stripped thyme leaves, chopped flat-leaf parsley, chopped dill, kosher salt, and freshly cracked black pepper to create the herb rub.
6. Sprinkle the herb rub evenly over the flesh side of each trout fillet, gently pressing to adhere.
7. Place the trout fillets, skin-side down, onto the preheated grill grates; close the lid and cook undisturbed for 6 minutes to achieve a crisp, golden-brown skin.
8. Using a thin, flexible spatula, carefully flip each fillet and cook for an additional 4-6 minutes, or until the flesh is opaque and flakes easily with a fork, indicating doneness.
9. Transfer the grilled trout fillets to a clean platter and allow them to rest for 3 minutes before serving to let the juices redistribute.
10. Serve each fillet immediately with a fresh lemon wedge on the side for squeezing.
Elegantly plated, the trout boasts a beautifully crisp, golden skin that gives way to moist, tender flakes infused with the bright, aromatic notes of thyme, parsley, and dill. The subtle acidity from the lemon cuts through the richness, creating a perfectly balanced flavor profile. For a stunning presentation, serve atop a bed of lemony couscous or alongside grilled asparagus spears, allowing the vibrant colors and fresh flavors to complement each other on the plate.
Yellowstone Bison Burgers
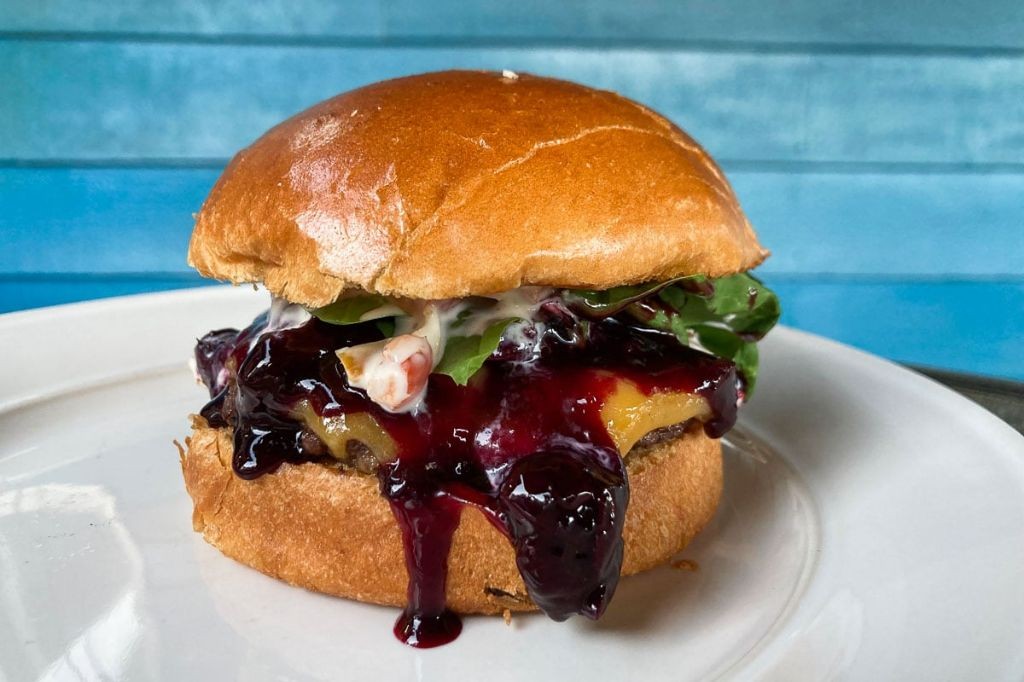
Heralding the rugged spirit of the American West, the Yellowstone Bison Burger offers a sophisticated twist on a classic. Crafted with lean, richly flavored bison, this recipe elevates the backyard staple into an elegant centerpiece, perfect for a refined summer gathering or a cozy winter evening by the fire.
Serving: 4 | Pre Time: 20 minutes | Cooking Time: 10 minutes
Ingredients
– 1 ½ pounds ground bison (90% lean)
– 2 tablespoons clarified butter, melted
– 1 large shallot, finely minced
– 2 garlic cloves, finely minced
– 1 tablespoon Worcestershire sauce
– 1 teaspoon Dijon mustard
– 1 teaspoon kosher salt
– ½ teaspoon freshly cracked black pepper
– 4 brioche burger buns, split
– 4 slices aged white cheddar cheese
– 1 cup baby arugula
Instructions
1. In a large mixing bowl, gently combine the ground bison, minced shallot, minced garlic, Worcestershire sauce, Dijon mustard, kosher salt, and black pepper until just incorporated; avoid overmixing to prevent dense patties.
2. Divide the mixture into four equal portions and form into ¾-inch thick patties, creating a slight dimple in the center of each with your thumb to ensure even cooking.
3. Preheat a cast-iron skillet or grill over medium-high heat until it reaches approximately 400°F.
4. Brush the cooking surface lightly with half of the melted clarified butter.
5. Place the patties in the skillet and cook undisturbed for 4 minutes to develop a deep, caramelized crust.
6. Carefully flip the patties and cook for an additional 3 minutes for medium-rare, or until the internal temperature registers 130°F on an instant-read thermometer.
7. During the final minute of cooking, place one slice of aged white cheddar cheese on each patty and cover the skillet briefly to allow the cheese to melt.
8. While the patties rest, brush the cut sides of the brioche buns with the remaining clarified butter and toast in the skillet for 45-60 seconds until golden brown.
9. Assemble the burgers by placing each patty on a toasted bun bottom, topping with ¼ cup of baby arugula, and finishing with the bun top.
Meticulously crafted, these burgers present a harmonious contrast: the juicy, mineral-rich bison patty yields to a satisfying bite, while the melted cheddar provides a creamy sharpness that cuts through the richness. Serve them alongside crisp, hand-cut fries dusted with smoked paprika or a vibrant heirloom tomato salad for a complete, restaurant-worthy plate.
Dutch Oven Cornbread
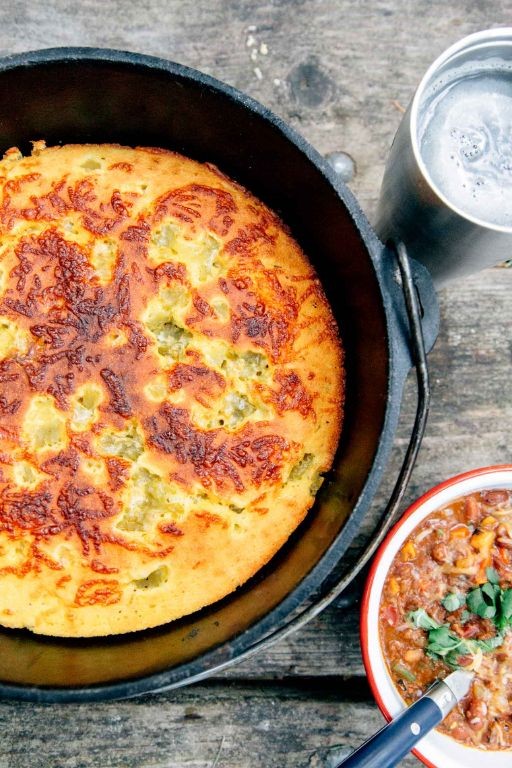
Heralding the warmth of the hearth, this Dutch oven cornbread emerges with a golden, craggy crown and a tender, soul-satisfying crumb. It is a rustic yet refined staple, where the deep, even heat of the cast iron transforms simple ingredients into a masterpiece of texture and flavor, perfect for gracing any holiday table or cozy winter supper.
Serving: 8 | Pre Time: 15 minutes | Cooking Time: 25 minutes
Ingredients
– 1 ½ cups fine-grind stone-ground yellow cornmeal
– ½ cup all-purpose flour, sifted
– 1 tablespoon aluminum-free baking powder
– 1 teaspoon fine sea salt
– 2 large pasture-raised eggs, lightly beaten
– 1 ¼ cups full-fat buttermilk, at room temperature
– ¼ cup pure maple syrup
– 6 tablespoons unsalted European-style butter, melted and slightly cooled
– 2 tablespoons clarified butter (ghee)
Instructions
1. Position a rack in the center of your oven and preheat it to 425°F.
2. Place a 4-quart enameled Dutch oven (with its lid) inside the oven to preheat for 20 minutes.
3. In a large mixing bowl, whisk together the fine-grind stone-ground yellow cornmeal, sifted all-purpose flour, aluminum-free baking powder, and fine sea salt until thoroughly combined.
4. In a separate medium bowl, combine the lightly beaten pasture-raised eggs, room-temperature full-fat buttermilk, pure maple syrup, and the 6 tablespoons of melted, slightly cooled unsalted European-style butter; whisk until the mixture is completely homogenous.
5. Pour the wet ingredients into the dry ingredients and fold gently with a spatula just until no dry streaks remain; do not overmix.
6. Using oven mitts, carefully remove the preheated Dutch oven from the oven and place it on a heatproof surface.
7. Add the 2 tablespoons of clarified butter to the hot Dutch oven, swirling to coat the bottom and about 1 inch up the sides.
8. Immediately pour the batter into the center of the Dutch oven; it should sizzle gently upon contact.
9. Cover the Dutch oven with its preheated lid and carefully return it to the oven.
10. Bake, covered, for 20 minutes at 425°F.
11. After 20 minutes, remove the lid to allow the top to brown.
12. Continue baking, uncovered, for 5-7 minutes, or until the cornbread is deeply golden brown and a cake tester inserted into the center comes out clean.
13. Using oven mitts, transfer the Dutch oven to a wire cooling rack and let the cornbread rest inside it for 10 minutes.
14. Carefully invert the cornbread onto the rack, then turn it right-side-up to cool slightly before serving.
This cornbread boasts a crisp, buttery crust that gives way to a moist, tender interior with a subtle sweetness from the maple. The clarified butter ensures an exceptional, non-stick release and a rich, nutty flavor. Try serving warm slices alongside a pot of hearty chili or slathered with cultured honey butter for an elevated, comforting treat.
Campfire Potatoes with Bacon
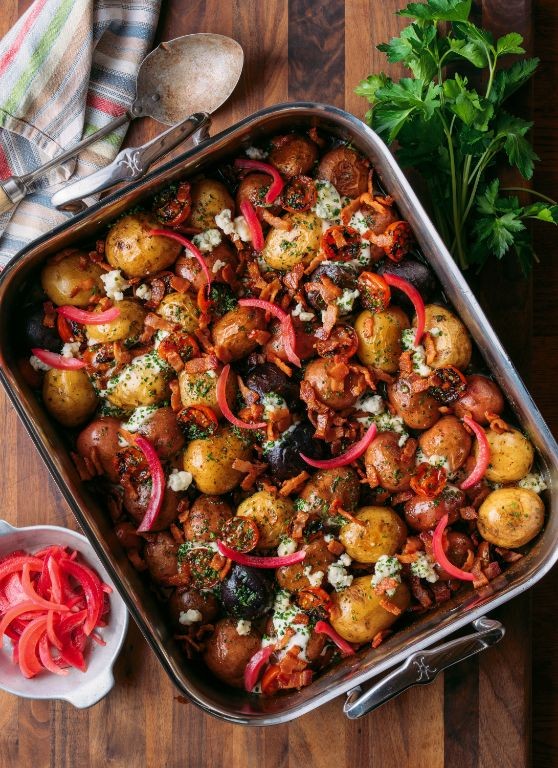
Nestled at the intersection of rustic charm and refined comfort, Campfire Potatoes with Bacon transforms humble ingredients into a show-stopping side dish. Imagine tender, golden potatoes infused with the smoky essence of bacon and aromatic herbs, achieving a perfect balance of crisp exterior and creamy interior that elevates any gathering from ordinary to memorable.
Serving: 6 | Pre Time: 15 minutes | Cooking Time: 45 minutes
Ingredients
- 2 pounds Yukon Gold potatoes, scrubbed and cut into 1-inch wedges
- 6 ounces thick-cut applewood-smoked bacon, diced into ½-inch pieces
- 3 tablespoons extra-virgin olive oil
- 4 cloves garlic, finely minced
- 2 tablespoons fresh rosemary, finely chopped
- 1 teaspoon flaky sea salt
- ½ teaspoon freshly cracked black pepper
- ¼ cup grated Parmigiano-Reggiano cheese
- 2 tablespoons fresh chives, thinly sliced
Instructions
- Preheat your oven to 425°F (218°C) and position a rack in the center.
- In a large cast-iron skillet over medium heat, render the diced bacon for 8–10 minutes until crisp and golden, stirring occasionally.
- Using a slotted spoon, transfer the crisp bacon to a paper towel-lined plate, leaving the rendered fat in the skillet.
- Add the extra-virgin olive oil to the skillet with the bacon fat and heat over medium-high until shimmering.
- Carefully add the potato wedges in a single layer, seasoning immediately with the flaky sea salt and black pepper.
- Sear the potatoes undisturbed for 5–7 minutes until a deep golden crust forms on one side, then flip each wedge using tongs.
- Scatter the minced garlic and chopped rosemary evenly over the potatoes, stirring gently to coat.
- Transfer the skillet to the preheated oven and roast for 25–30 minutes, flipping the potatoes halfway through, until fork-tender and crisped at the edges.
- Remove the skillet from the oven and immediately sprinkle with the grated Parmigiano-Reggiano cheese, allowing residual heat to melt it slightly.
- Garnish with the reserved crisp bacon and fresh chives before serving.
Meticulously crafted, this dish delivers a symphony of textures: shatteringly crisp bacon contrasts with the potatoes’ creamy centers, while the rosemary and garlic create an aromatic backbone. For a stunning presentation, serve directly from the skillet alongside grilled ribeye or as the centerpiece of a brunch spread topped with a softly poached egg.
Venison Sausage and Cabbage Skillet
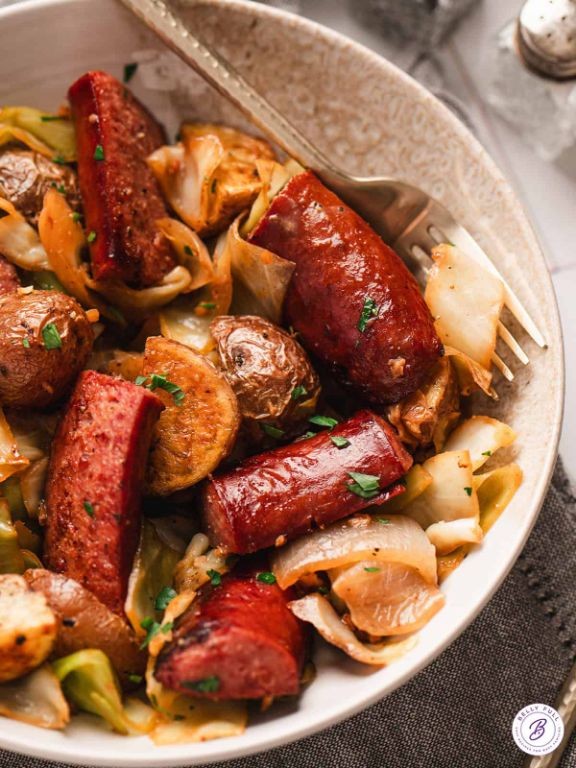
On a crisp winter evening, few dishes offer the rustic elegance and hearty satisfaction of a skillet meal that marries robust venison sausage with tender, sweet cabbage. This one-pan wonder transforms humble ingredients into a sophisticated dinner that feels both comforting and refined, perfect for a festive gathering or a cozy weeknight. With its rich flavors and effortless preparation, it’s a testament to how simple components can create something truly extraordinary.
Serving: 4 | Pre Time: 15 minutes | Cooking Time: 25 minutes
Ingredients
– 1 pound venison sausage links, casings removed
– 1 large head of green cabbage, cored and thinly sliced
– 1 medium yellow onion, finely diced
– 2 cloves garlic, minced
– 2 tablespoons clarified butter
– 1 cup low-sodium chicken stock
– 1 tablespoon apple cider vinegar
– 1 teaspoon smoked paprika
– ½ teaspoon freshly ground black pepper
– ¼ teaspoon fine sea salt
– 2 tablespoons fresh parsley, finely chopped for garnish
Instructions
1. Heat a large cast-iron skillet over medium-high heat and add 1 tablespoon of clarified butter.
2. Add the venison sausage, breaking it into small crumbles with a wooden spoon, and cook for 5–7 minutes until browned and cooked through; transfer to a plate and set aside.
3. In the same skillet, add the remaining tablespoon of clarified butter, then sauté the diced yellow onion for 3–4 minutes until translucent and fragrant.
4. Stir in the minced garlic and cook for 1 minute until aromatic, being careful not to burn it to preserve its delicate flavor.
5. Add the thinly sliced cabbage to the skillet, tossing to coat in the butter and aromatics, and cook for 5 minutes until slightly wilted.
6. Pour in the low-sodium chicken stock and apple cider vinegar, then season with smoked paprika, freshly ground black pepper, and fine sea salt.
7. Reduce the heat to medium-low, cover the skillet, and simmer for 10–12 minutes until the cabbage is tender but still retains a slight crunch.
8. Return the cooked venison sausage to the skillet, stirring to combine, and cook uncovered for 2–3 minutes to allow the flavors to meld.
9. Remove from heat and garnish with finely chopped fresh parsley before serving.
Key to this dish’s appeal is the contrast between the savory, gamey notes of the venison and the sweet, caramelized cabbage, all brought together by a subtle tang from the vinegar. Serve it straight from the skillet with crusty bread to soak up the rich juices, or pair it with creamy mashed potatoes for a more indulgent meal that highlights its rustic elegance.
Homemade Huckleberry Jam
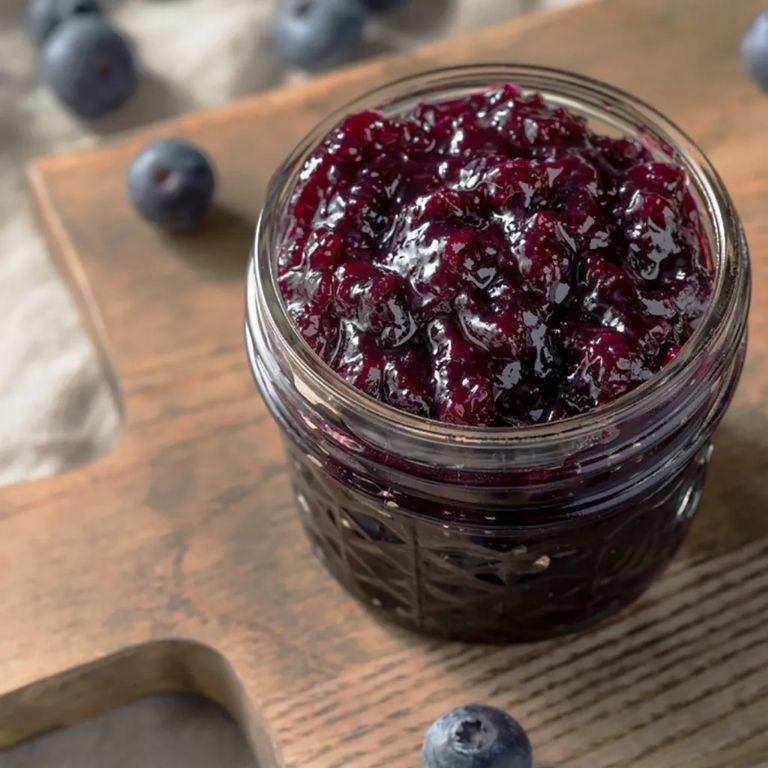
Savoring the wild essence of summer, this Homemade Huckleberry Jam captures the fleeting, tart-sweet magic of freshly foraged berries in a jewel-toned preserve. Crafted with minimal intervention to honor the fruit’s vibrant character, it transforms humble ingredients into an artisanal spread that elevates everything from morning toast to elegant cheese boards.
Serving: 4 cups | Pre Time: 15 minutes | Cooking Time: 25 minutes
Ingredients
– 4 cups fresh huckleberries, gently rinsed and patted dry
– 2 cups granulated sugar
– ¼ cup freshly squeezed lemon juice
– 1 tablespoon high-pectin powdered fruit pectin
– 1 teaspoon pure vanilla extract
Instructions
1. Combine the huckleberries, granulated sugar, and lemon juice in a heavy-bottomed, non-reactive saucepan over medium heat, stirring gently with a wooden spoon until the sugar dissolves completely, about 5 minutes.
2. Increase the heat to medium-high and bring the mixture to a full, rolling boil that cannot be stirred down, which should take approximately 8–10 minutes.
3. Sprinkle the powdered fruit pectin evenly over the boiling mixture while stirring constantly to prevent clumping, and maintain the vigorous boil for exactly 1 minute to activate the pectin.
4. Reduce the heat to low and simmer the jam for 15 minutes, skimming off any foam that rises to the surface with a slotted spoon to ensure a clear, glossy finish.
5. Remove the saucepan from the heat and stir in the pure vanilla extract until fully incorporated, about 30 seconds.
6. Carefully ladle the hot jam into sterilized 8-ounce glass jars, leaving a ¼-inch headspace at the top, and immediately seal with prepared lids.
7. Process the sealed jars in a boiling water bath for 10 minutes to achieve a proper vacuum seal, then transfer them to a wire rack to cool completely at room temperature for 12 hours.
8. Check each jar’s seal by pressing the center of the lid; if it does not flex, the seal is secure and the jam is ready for storage in a cool, dark pantry.
With its deep purple hue and glossy sheen, this jam sets into a softly gelled texture that bursts with the bright, tangy flavor of huckleberries, balanced by a subtle vanilla warmth. Spread it over warm buttermilk biscuits, swirl it into yogurt, or pair it with aged goat cheese for a sophisticated appetizer that celebrates the berry’s wild provenance.
Grilled Elk Kabobs with Vegetables
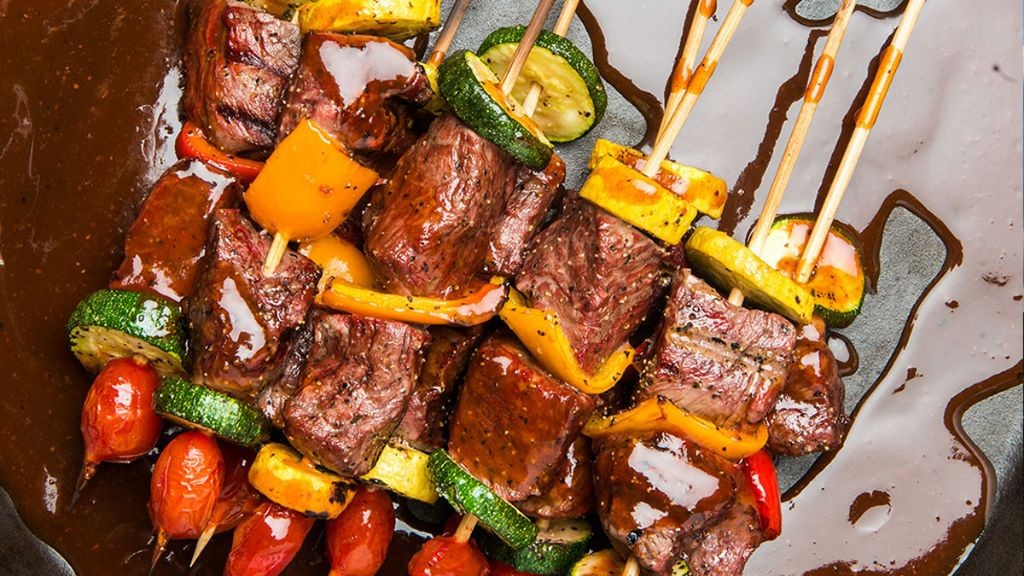
Luxuriously lean yet richly flavored, grilled elk kabobs offer a sophisticated twist on classic skewers, marrying the gamey depth of wild elk with the vibrant sweetness of seasonal vegetables. This elegant preparation transforms simple ingredients into a show-stopping centerpiece perfect for holiday gatherings or summer soirées, where each tender morsel promises a harmonious balance of savory and sweet notes. Crafted with precision and care, these kabobs elevate outdoor cooking to an art form, delivering both visual appeal and complex flavor profiles in every bite.
Serving: 4 | Pre Time: 25 minutes | Cooking Time: 12 minutes
Ingredients
– 1.5 pounds wild elk loin, cut into 1.5-inch cubes
– 2 tablespoons extra-virgin olive oil
– 3 cloves garlic, finely minced
– 1 tablespoon fresh rosemary, finely chopped
– 1 teaspoon kosher salt
– ½ teaspoon freshly cracked black pepper
– 1 large red bell pepper, seeded and cut into 1.5-inch pieces
– 1 medium red onion, peeled and cut into 1.5-inch wedges
– 8 ounces cremini mushrooms, stems trimmed
– 2 tablespoons clarified butter, melted
Instructions
1. In a medium mixing bowl, combine the extra-virgin olive oil, minced garlic, chopped rosemary, kosher salt, and black pepper to create a marinade.
2. Add the cubed elk loin to the bowl, tossing thoroughly to coat each piece evenly with the marinade, then cover and refrigerate for 20 minutes to allow the flavors to penetrate.
3. While the elk marinates, soak 8 wooden skewers in cold water for 15 minutes to prevent burning during grilling.
4. Preheat a gas or charcoal grill to medium-high heat, achieving a surface temperature of 400°F.
5. Thread the marinated elk cubes alternately with the red bell pepper pieces, red onion wedges, and cremini mushrooms onto the soaked skewers, leaving a small gap between ingredients to ensure even cooking.
6. Brush the assembled kabobs lightly with melted clarified butter using a pastry brush, which adds a rich flavor and promotes a golden sear.
7. Place the kabobs directly on the preheated grill grates, cooking for 5-6 minutes per side, or until the elk reaches an internal temperature of 135°F for medium-rare, as verified with an instant-read thermometer.
8. Rotate the kabobs a quarter turn every 2 minutes to create attractive grill marks and prevent sticking, a technique that enhances both presentation and texture.
9. Transfer the cooked kabobs to a clean platter and let them rest for 3 minutes before serving to allow the juices to redistribute, ensuring maximum tenderness.
Each bite reveals the elk’s tender, slightly gamey essence, beautifully complemented by the caramelized sweetness of the vegetables and the aromatic hint of rosemary. For an elegant presentation, serve these kabobs atop a bed of wild rice pilaf or alongside a crisp arugula salad dressed with a lemon vinaigrette, allowing the robust flavors to shine through in every sophisticated mouthful.
Smoked Bison Ribs
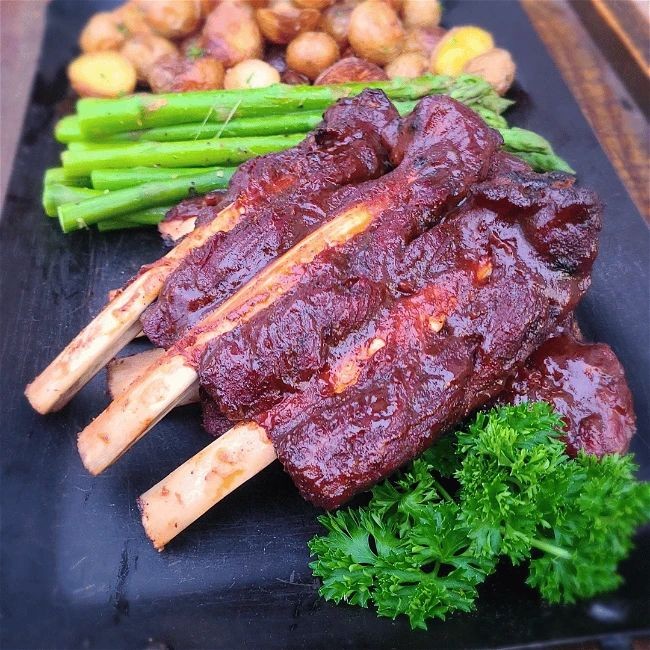
Venture into the realm of elevated barbecue with smoked bison ribs, a dish that transforms a majestic, heritage protein into a succulent, fall-off-the-bone masterpiece through the alchemy of low-and-slow smoking. This recipe celebrates the bison’s robust, slightly sweet flavor, which is beautifully enhanced by a complex spice rub and a whisper of hardwood smoke, resulting in a centerpiece worthy of any sophisticated gathering.
Serving: 4 | Pre Time: 30 minutes | Cooking Time: 6 hours
Ingredients
– 1 full rack of bison ribs (approximately 4 pounds)
– 3 tablespoons high-smoke-point avocado oil
– 1/4 cup dark brown sugar, firmly packed
– 2 tablespoons smoked paprika
– 1 tablespoon granulated garlic
– 1 tablespoon onion powder
– 2 teaspoons freshly cracked black pepper
– 1 teaspoon fine sea salt
– 1/2 teaspoon cayenne pepper
– 2 cups apple cider vinegar
– 1 cup filtered water
– 1/2 cup unsulfured blackstrap molasses
– 4 cups hickory wood chips, soaked in cold water for 1 hour
Instructions
1. Pat the bison rib rack completely dry with paper towels to ensure optimal spice adhesion.
2. Brush the entire surface of the ribs lightly with the avocado oil.
3. In a small bowl, whisk together the dark brown sugar, smoked paprika, granulated garlic, onion powder, black pepper, sea salt, and cayenne pepper to create the dry rub.
4. Apply the dry rub evenly over all surfaces of the ribs, pressing gently to adhere.
5. Allow the seasoned ribs to rest, uncovered, at room temperature for 25 minutes to let the flavors penetrate.
6. While the ribs rest, prepare your smoker by preheating it to a consistent 225°F.
7. Drain the soaked hickory wood chips and add them to the smoker’s chip box according to the manufacturer’s instructions.
8. In a separate saucepan, combine the apple cider vinegar, filtered water, and blackstrap molasses, bringing the mixture to a simmer over medium heat to create a spritz; set aside to cool slightly.
9. Place the rib rack directly on the smoker grate, bone-side down.
10. Smoke the ribs for 3 hours, maintaining the smoker temperature at 225°F.
11. After 3 hours, spritz the ribs generously every 45 minutes with the vinegar-molasses mixture using a spray bottle to keep them moist and build a flavorful bark.
12. Continue smoking until the internal temperature of the meat reaches 203°F when probed in the thickest part between the bones, approximately 3 additional hours.
13. Carefully remove the ribs from the smoker and transfer them to a clean cutting board.
14. Tent the ribs loosely with aluminum foil and allow them to rest for 25 minutes to let the juices redistribute.
15. Slice the ribs between the bones and serve immediately.
Amazingly tender, the meat yields effortlessly to the pull of a fork, boasting a perfect harmony of savory spice, subtle sweetness, and profound smokiness. Consider serving these majestic ribs atop a pool of creamy Anson Mills grits or alongside a crisp, shaved fennel and apple slaw to cut through the richness, creating a truly memorable plate.
Cast Iron Skillet Trout with Almonds
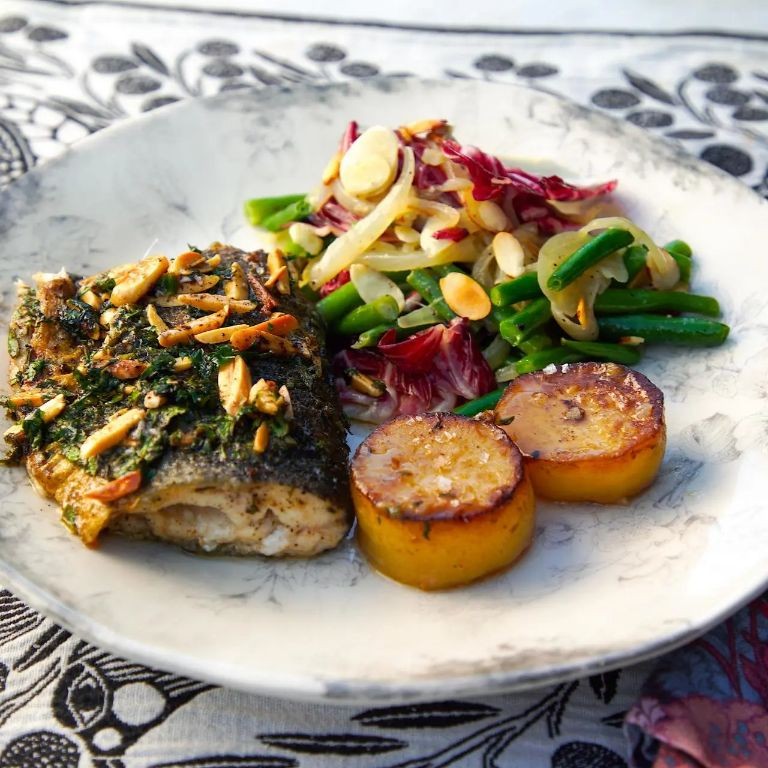
Zestful yet refined, this cast iron skillet trout with almonds transforms humble ingredients into an elegant centerpiece. The trout’s delicate flesh crisps beautifully in the skillet while toasted almonds add a sophisticated crunch. It’s a dish that feels both rustic and luxurious—perfect for an impressive weeknight dinner or a special occasion.
Serving: 2 | Pre Time: 10 minutes | Cooking Time: 12 minutes
Ingredients
– 2 (6-ounce) skin-on rainbow trout fillets
– 3 tablespoons clarified butter, divided
– ½ cup sliced almonds
– 1 tablespoon fresh lemon juice
– 1 teaspoon finely chopped fresh parsley
– ½ teaspoon kosher salt
– ¼ teaspoon freshly ground black pepper
– 2 lemon wedges for serving
Instructions
1. Pat the trout fillets completely dry with paper towels to ensure a crisp skin.
2. Season both sides of the fillets evenly with kosher salt and freshly ground black pepper.
3. Heat a 10-inch cast iron skillet over medium heat for 2 minutes until evenly warm.
4. Add 2 tablespoons of clarified butter to the skillet, swirling to coat the surface.
5. Place the trout fillets skin-side down in the skillet, pressing gently with a spatula for 10 seconds to prevent curling.
6. Cook undisturbed for 4–5 minutes until the skin is golden brown and crisp.
7. Carefully flip the fillets using a thin metal spatula and cook for 2–3 minutes until the flesh is opaque and flakes easily.
8. Transfer the cooked trout to a warm plate and tent loosely with foil.
9. Add the remaining 1 tablespoon of clarified butter to the same skillet.
10. Add the sliced almonds and toast for 2–3 minutes, stirring constantly, until fragrant and golden brown.
11. Remove the skillet from heat and immediately stir in the fresh lemon juice to stop the cooking process.
12. Spoon the toasted almond mixture evenly over the plated trout fillets.
13. Garnish with finely chopped fresh parsley and serve immediately with lemon wedges on the side.
The trout offers a delightful contrast between the crackling, salty skin and the moist, flaky interior. The toasted almonds provide a nutty richness that complements the fish’s mild sweetness, while the lemon brightens each bite. For a complete meal, serve alongside buttery roasted fingerling potatoes or a simple arugula salad dressed with champagne vinaigrette.
Campfire Baked Beans
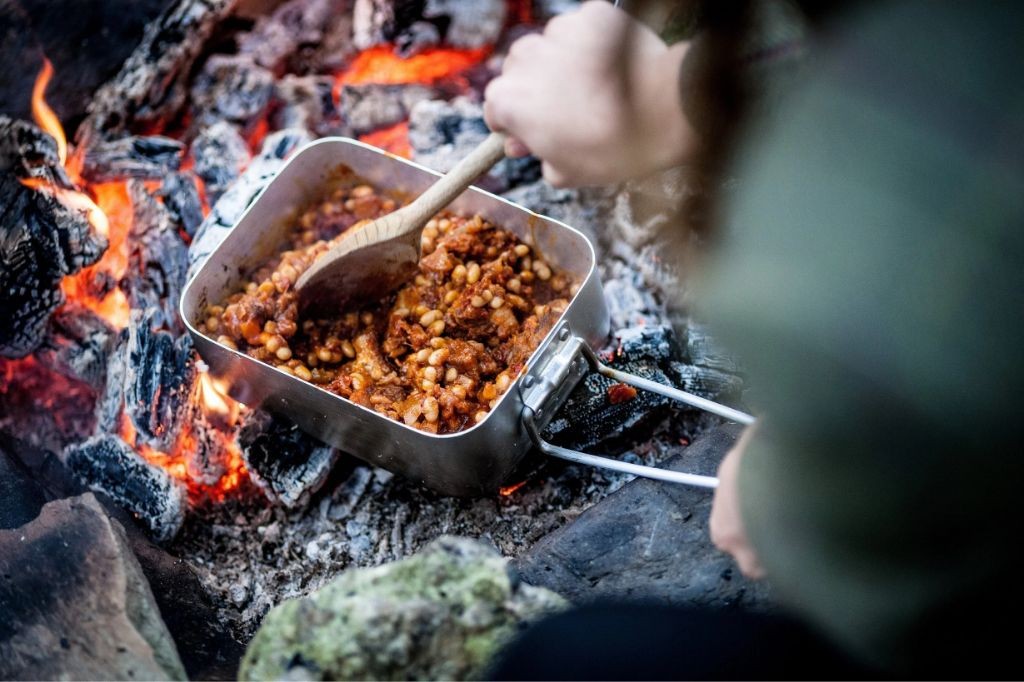
Lingering in the collective memory of American cookouts, campfire baked beans evoke rustic gatherings with their smoky-sweet aroma and hearty texture, a dish that transforms humble legumes into a richly layered side through slow, deliberate cooking. This elevated version balances the deep umami of cured pork with the subtle sweetness of maple and the gentle acidity of tomatoes, creating a complex flavor profile that honors tradition while refining it for the modern table. Perfect for holiday feasts or weekend gatherings, it simmers to a velvety consistency that clings lovingly to a spoon.
Serving: 8 | Pre Time: 20 minutes | Cooking Time: 2 hours
Ingredients
– 1 pound dried navy beans, soaked overnight
– 6 ounces thick-cut applewood-smoked bacon, diced
– 1 large yellow onion, finely diced
– 4 cloves garlic, minced
– 1 cup tomato purée
– ½ cup pure maple syrup
– ¼ cup apple cider vinegar
– 2 tablespoons Dijon mustard
– 1 tablespoon Worcestershire sauce
– 1 teaspoon smoked paprika
– ½ teaspoon freshly ground black pepper
– 4 cups low-sodium chicken stock
– 2 sprigs fresh thyme
– 1 bay leaf
– Fine sea salt, as needed
Instructions
1. Drain the soaked navy beans and rinse them under cold running water until the water runs clear.
2. In a large Dutch oven over medium heat, render the diced bacon for 8–10 minutes until crisp and golden, stirring occasionally to prevent sticking.
3. Using a slotted spoon, transfer the bacon to a paper towel-lined plate, leaving the rendered fat in the pot.
4. Add the finely diced onion to the pot and sauté in the bacon fat for 6–8 minutes until translucent and lightly caramelized.
5. Stir in the minced garlic and cook for 1 minute until fragrant, being careful not to let it brown.
6. Pour in the tomato purée, maple syrup, apple cider vinegar, Dijon mustard, Worcestershire sauce, smoked paprika, and black pepper, whisking to combine thoroughly.
7. Add the drained beans, reserved bacon, chicken stock, thyme sprigs, and bay leaf, ensuring the liquid covers the beans by about 1 inch.
8. Bring the mixture to a gentle boil over high heat, then reduce the heat to low and cover the pot partially.
9. Simmer for 1 hour and 30 minutes to 2 hours, stirring every 30 minutes, until the beans are tender and the sauce has thickened to a glossy, syrup-like consistency.
10. Discard the thyme sprigs and bay leaf, then season with fine sea salt to balance the sweetness, starting with ½ teaspoon and adjusting as needed.
11. Let the beans rest off the heat for 10 minutes to allow the flavors to meld further before serving.
For a silky texture, avoid boiling vigorously once simmering begins, as this can break down the beans prematurely. To deepen the smoky notes, toast the smoked paprika in a dry skillet for 30 seconds before adding it to the pot. If the sauce thickens too quickly, add warm stock in ¼-cup increments to maintain a loose, spoonable consistency.
Finished with a glossy sheen, these beans offer a tender bite that yields effortlessly, enveloped in a sauce that strikes a perfect harmony between sweet, tangy, and savory notes. Serve them alongside grilled sausages or as a comforting base for poached eggs, where their robust character shines through, making them a versatile centerpiece for any rustic-inspired meal.
Wild Rice and Mushroom Casserole
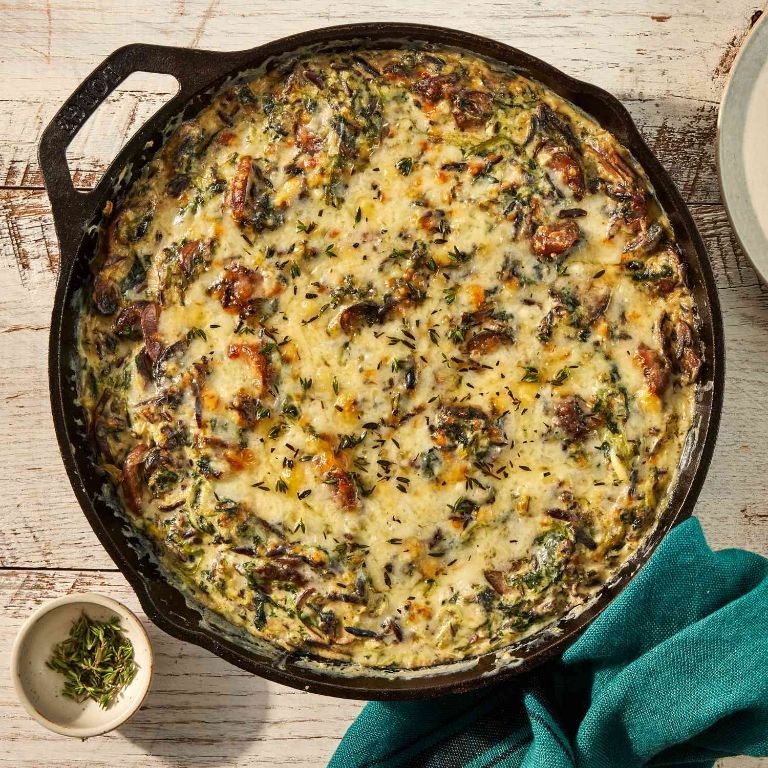
Kaleidoscopic in its earthy complexity, this wild rice and mushroom casserole emerges as the quintessential centerpiece for a refined winter gathering, where nutty grains and umami-rich fungi meld beneath a golden, herb-speckled crust. Its aromatic allure promises to transform any table into a scene of rustic elegance, offering both comforting warmth and sophisticated depth in every forkful.
Serving: 6 | Pre Time: 25 minutes | Cooking Time: 65 minutes
Ingredients
– 1 cup wild rice, rinsed
– 2 cups unsalted chicken stock
– 3 tablespoons clarified butter
– 1 pound assorted wild mushrooms (such as chanterelle, shiitake, and cremini), cleaned and sliced
– 1 large yellow onion, finely diced
– 3 cloves garlic, minced
– 1 cup heavy cream
– 1/2 cup dry white wine
– 1 teaspoon fresh thyme leaves, chopped
– 1/2 teaspoon freshly grated nutmeg
– 1 cup Gruyère cheese, freshly grated
– 1/2 cup panko breadcrumbs
– 2 tablespoons extra-virgin olive oil
– Kosher salt and freshly ground black pepper
Instructions
1. Preheat the oven to 375°F and lightly grease a 9×13-inch baking dish with clarified butter.
2. In a medium saucepan, combine the rinsed wild rice and unsalted chicken stock; bring to a boil over high heat, then reduce to a simmer, cover, and cook for 45 minutes until the grains are tender and have split open.
3. While the rice cooks, heat 2 tablespoons of clarified butter in a large skillet over medium-high heat until shimmering.
4. Add the sliced assorted wild mushrooms and cook, stirring occasionally, for 8-10 minutes until deeply browned and any released liquid has evaporated.
5. Transfer the mushrooms to a bowl, then add the remaining tablespoon of clarified butter to the skillet.
6. Sauté the finely diced yellow onion for 5-7 minutes until translucent and lightly caramelized, then stir in the minced garlic and cook for 1 minute until fragrant.
7. Deglaze the skillet with dry white wine, scraping up any browned bits, and simmer for 2-3 minutes until reduced by half.
8. Stir in the heavy cream, chopped fresh thyme leaves, and freshly grated nutmeg, then season with kosher salt and freshly ground black pepper to taste.
9. Combine the cooked wild rice, sautéed mushrooms, and cream mixture in a large bowl, folding gently to incorporate evenly.
10. Transfer the mixture to the prepared baking dish and spread into an even layer.
11. In a small bowl, toss the freshly grated Gruyère cheese and panko breadcrumbs with extra-virgin olive oil until evenly coated.
12. Sprinkle the cheese and breadcrumb mixture evenly over the casserole.
13. Bake in the preheated oven for 20-25 minutes until the topping is golden brown and the edges are bubbling.
14. Remove from the oven and let rest for 10 minutes before serving to allow the flavors to meld.
Gloriously textured, this casserole offers a delightful contrast between the chewy wild rice and tender mushrooms, all enveloped in a velvety, herb-infused cream. Serve it alongside a crisp green salad dressed with a sharp vinaigrette to cut through the richness, or as a hearty accompaniment to roasted poultry for a complete feast. The nutty Gruyère crust adds a satisfying crunch that elevates each bite into a celebration of winter’s bounty.
Dutch Oven Apple Cobbler
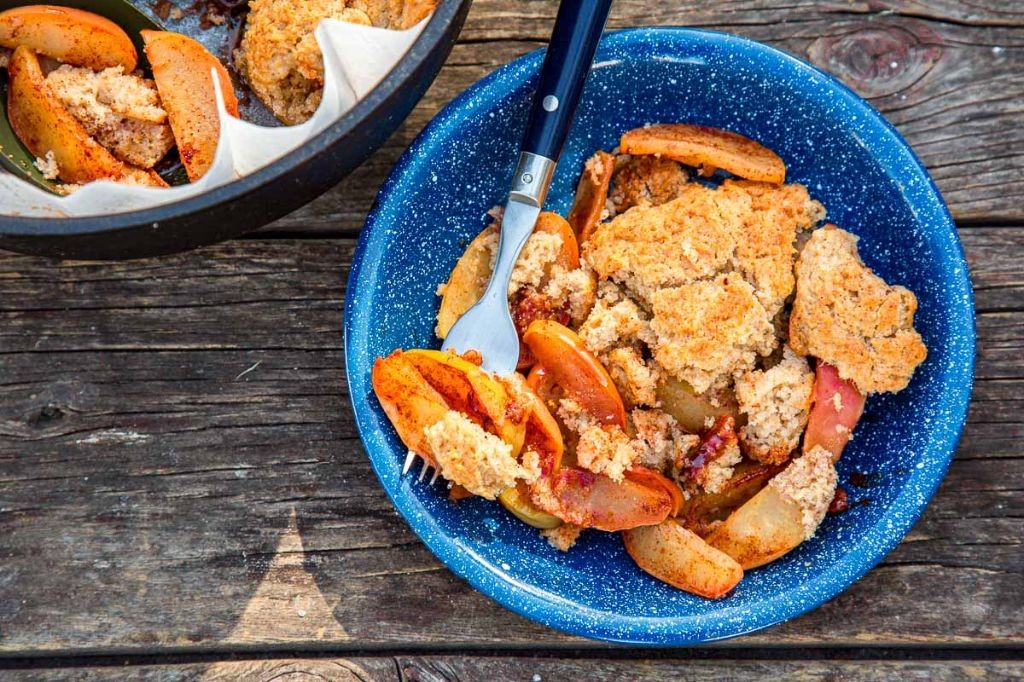
Savor the comforting embrace of a Dutch oven apple cobbler, where tender, spiced apples bubble beneath a golden, buttery biscuit topping. This rustic yet refined dessert transforms humble ingredients into a showstopping finale, perfect for holiday gatherings or cozy winter evenings. Its inviting aroma and homestyle charm make it an instant classic that feels both nostalgic and elegantly simple.
Serving: 8 | Pre Time: 20 minutes | Cooking Time: 45 minutes
Ingredients
– 6 large Granny Smith apples, peeled, cored, and sliced into ¼-inch wedges
– ¾ cup granulated sugar
– ¼ cup light brown sugar, firmly packed
– 2 tablespoons all-purpose flour
– 1 teaspoon ground cinnamon
– ¼ teaspoon freshly grated nutmeg
– ¼ teaspoon fine sea salt
– 1 tablespoon freshly squeezed lemon juice
– 1½ cups all-purpose flour
– ½ cup granulated sugar
– 1½ teaspoons baking powder
– ½ teaspoon fine sea salt
– ½ cup unsalted European-style butter, cold and cubed
– ¾ cup heavy cream
– 1 large pasture-raised egg, lightly beaten
– 1 teaspoon pure vanilla extract
Instructions
1. Preheat your oven to 375°F (190°C).
2. In a large mixing bowl, combine the sliced Granny Smith apples, ¾ cup granulated sugar, light brown sugar, 2 tablespoons all-purpose flour, ground cinnamon, freshly grated nutmeg, ¼ teaspoon fine sea salt, and freshly squeezed lemon juice; toss gently until the apples are evenly coated.
3. Transfer the apple mixture to a 5-quart Dutch oven, spreading it into an even layer.
4. In a separate bowl, whisk together 1½ cups all-purpose flour, ½ cup granulated sugar, 1½ teaspoons baking powder, and ½ teaspoon fine sea salt.
5. Add the cold, cubed unsalted European-style butter to the dry ingredients; using a pastry cutter or your fingertips, work the butter into the flour mixture until it resembles coarse crumbs with pea-sized pieces remaining.
6. In a small bowl, whisk the heavy cream, lightly beaten pasture-raised egg, and pure vanilla extract until fully combined.
7. Pour the cream mixture into the flour-butter mixture; stir gently with a fork just until a shaggy dough forms, being careful not to overmix to ensure a tender biscuit topping.
8. Drop spoonfuls of the dough evenly over the apple mixture in the Dutch oven, leaving small gaps for steam to escape during baking.
9. Place the Dutch oven, uncovered, in the preheated oven and bake for 40–45 minutes, or until the topping is golden brown and a toothpick inserted into the biscuit layer comes out clean.
10. Remove from the oven and let the cobbler rest for 15 minutes before serving to allow the filling to thicken slightly.
Rich with caramelized notes from the baked apples, this cobbler offers a delightful contrast between the soft, spiced fruit and the crisp, buttery biscuit crust. Serve it warm with a drizzle of cold crème fraîche or a scoop of vanilla bean ice cream to highlight its comforting warmth and complex flavors.
Grilled Bison Steak with Chimichurri
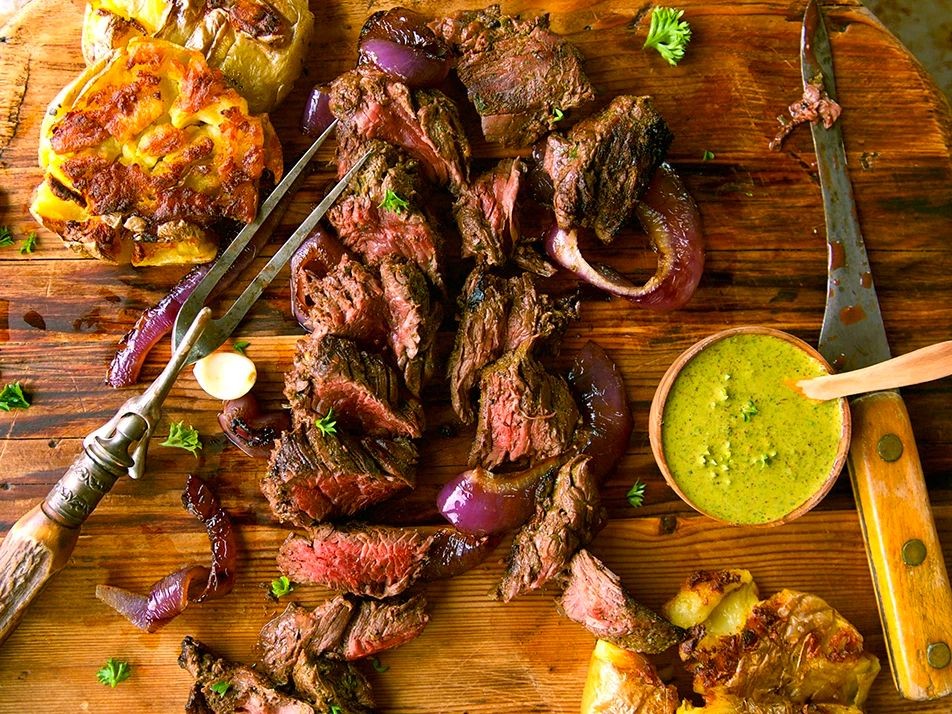
Glistening with the promise of a sophisticated yet approachable feast, grilled bison steak with chimichurri elevates the classic cookout into an elegant culinary event. This dish masterfully pairs the lean, mineral-rich depth of bison with the vibrant, herbaceous punch of a hand-chopped Argentine sauce, creating a harmonious balance that is both rustic and refined. Perfect for a celebratory dinner, it transforms simple ingredients into a memorable centerpiece.
Serving: 4 | Pre Time: 25 minutes | Cooking Time: 12 minutes
Ingredients
- 2 pounds bison strip loin steak, approximately 1.5 inches thick
- 2 tablespoons extra-virgin olive oil
- 1 tablespoon kosher salt
- 1 teaspoon freshly cracked black peppercorns
- 1 cup tightly packed fresh flat-leaf parsley leaves, finely chopped
- 1/2 cup tightly packed fresh cilantro leaves, finely chopped
- 1/4 cup finely minced red onion
- 3 cloves garlic, finely minced
- 1/4 cup red wine vinegar
- 1/2 cup extra-virgin olive oil
- 1/2 teaspoon crushed red pepper flakes
Instructions
- Remove the bison steak from refrigeration and let it rest at room temperature for 30 minutes to ensure even cooking.
- While the steak rests, prepare the chimichurri by combining the finely chopped parsley, cilantro, minced red onion, and minced garlic in a medium bowl.
- Whisk the red wine vinegar and 1/2 cup of extra-virgin olive oil together in a separate small bowl until emulsified.
- Pour the vinegar-oil mixture over the herb blend, add the crushed red pepper flakes, and stir gently to combine; set the sauce aside to allow the flavors to meld.
- Pat the bison steak completely dry with paper towels to promote optimal searing.
- Drizzle 2 tablespoons of extra-virgin olive oil over the steak, then season all sides generously with the kosher salt and freshly cracked black peppercorns.
- Preheat a grill or grill pan to high heat, aiming for a surface temperature of approximately 450°F.
- Place the seasoned steak on the hot grill and cook, undisturbed, for 5 minutes to develop a deep, caramelized crust.
- Using tongs, flip the steak and cook for an additional 5 minutes for medium-rare, or until an instant-read thermometer inserted into the thickest part registers 130°F.
- Transfer the grilled steak to a clean cutting board and let it rest, tented loosely with foil, for 10 minutes; this allows the juices to redistribute, ensuring a succulent result.
- Slice the rested steak against the grain into 1/2-inch thick strips.
- Arrange the sliced bison on a serving platter and spoon the prepared chimichurri generously over the top.
Finally, the rested steak yields a tender, juicy interior with a perfectly charred, smoky crust, beautifully contrasted by the chimichurri’s bright acidity and herbal freshness. For a creative presentation, serve the sliced steak atop a bed of creamy polenta or alongside grilled asparagus, allowing the robust sauce to mingle with each component. This dish celebrates the sublime texture of responsibly sourced bison, making it an impressive yet wholly satisfying main course for any gathering.
Yellowstone Campfire S’mores

There’s something magical about gathering around a crackling fire under a starry sky, a tradition that finds its sweetest expression in this elevated campfire classic. This refined version of the beloved s’more captures that nostalgic essence while introducing a layer of sophisticated flavor and texture, transforming a simple treat into a memorable culinary experience.
Serving: 4 | Pre Time: 10 minutes | Cooking Time: 5 minutes
Ingredients
– 8 artisanal graham crackers, approximately 2.5 inches square
– 4 ounces high-quality dark chocolate (70% cacao), broken into 1-ounce pieces
– 4 large marshmallows, preferably homemade or gourmet
– 1 tablespoon unsalted butter, clarified
– 1/4 teaspoon flaky sea salt, such as Maldon
Instructions
1. Arrange 4 artisanal graham crackers on a clean, heat-resistant surface, positioning them as the base for each s’more.
2. Place one 1-ounce piece of high-quality dark chocolate onto the center of each prepared graham cracker base.
3. For optimal melting, ensure the chocolate pieces are at room temperature (approximately 68-72°F) before assembly.
4. Using a long-handled metal skewer, carefully impale one large marshmallow through its center.
5. Hold the skewered marshmallow approximately 6 inches above the glowing embers of a campfire or a gas burner set to medium-low heat.
6. Rotate the marshmallow slowly and continuously for 2-3 minutes, until the exterior is uniformly golden-brown and the interior becomes molten.
7. Gently slide the toasted marshmallow directly from the skewer onto the chocolate-topped graham cracker, using a second graham cracker to press it down if necessary.
8. Immediately top each assembly with the remaining 4 graham crackers to form a sandwich, applying light pressure to encourage the heat to melt the chocolate.
9. While the s’more is still warm, lightly brush the exterior of each graham cracker with the clarified unsalted butter using a pastry brush.
10. As a final garnish, sprinkle a delicate pinch of flaky sea salt over the top of each assembled s’more.
The result is a sublime contrast: the crisp, buttery graham cracker yields to a molten core of rich, slightly bitter chocolate and sweet, gooey marshmallow, all brightened by the crystalline crunch of salt. For a creative presentation, serve them on a rustic wooden board alongside small glasses of chilled bourbon or a pot of strong coffee to complement the deep, smoky-sweet flavors.
Summary
Gathering these 20 hearty Yellowstone-inspired recipes brings the park’s wild beauty right to your kitchen. We hope you’ll try these comforting dishes, leave a comment with your favorite, and share this roundup on Pinterest to spread the warmth. Happy cooking!


